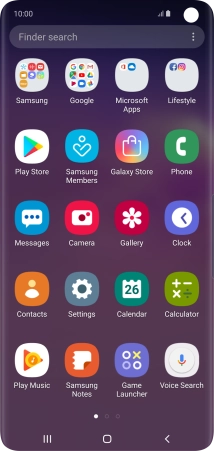
1. Find "Contacts"
Slide your finger upwards on the screen.
![](http://wmstatic.global.ssl.fastly.net/ml/7140723-f-82001f12-5ac0-4ab7-b54e-34f497279b52.png?width=214&height=454)
Press Contacts.
![](http://wmstatic.global.ssl.fastly.net/ml/7140723-f-e1107019-fd41-4a34-bbd5-27c25aa0e995.png?width=214&height=454)
2. Create contact
Press the new contact icon.
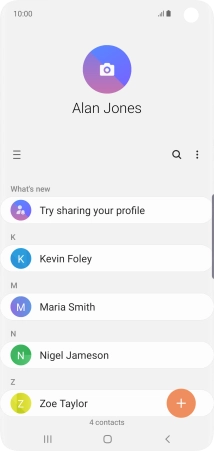
![](http://wmstatic.global.ssl.fastly.net/ml/7140723-f-92bb7cad-141b-498d-b1c9-aa7dfe9f8de2.png?width=214&height=454)
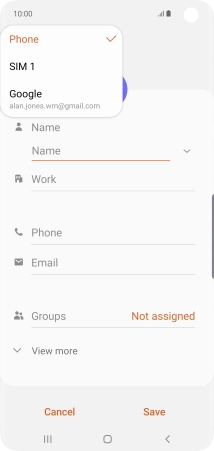
3. Select address book
Press the address book drop down list.
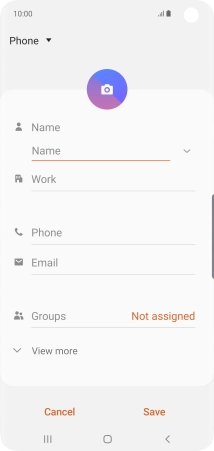
![](http://wmstatic.global.ssl.fastly.net/ml/7140723-f-fbe1e306-3ee3-418e-9c03-ccf364de19db.png?width=214&height=454)
Press Phone.
![](http://wmstatic.global.ssl.fastly.net/ml/7140723-f-184fab52-c029-4b6e-b807-c1d9e6d10d6e.png?width=214&height=454)
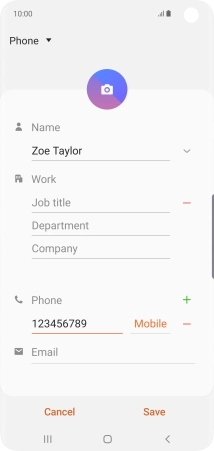
4. Enter name
Press the field below "Name" and key in the required name.
![](http://wmstatic.global.ssl.fastly.net/ml/7140723-f-fbe1e306-3ee3-418e-9c03-ccf364de19db.png?width=214&height=454)
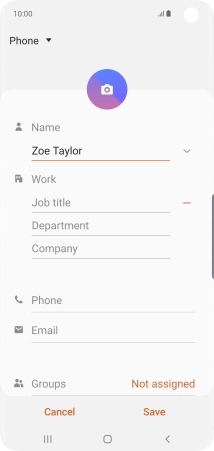
5. Enter phone number
Press Phone and key in the required phone number.
Follow the instructions on the screen to add more information such as an email address and a personal ring tone.
![](http://wmstatic.global.ssl.fastly.net/ml/7140723-f-fe32fc83-a123-4bf6-9253-2337d9eadba4.png?width=214&height=454)
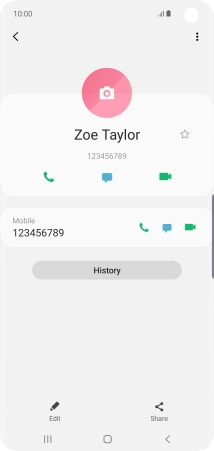
6. Save contact
Press Save.
![](http://wmstatic.global.ssl.fastly.net/ml/7140723-f-1aecca73-9a20-466d-8294-5135f417f714.png?width=214&height=454)
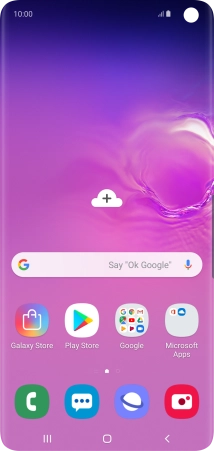
7. Return to the home screen
Press the Home key to return to the home screen.
![](http://wmstatic.global.ssl.fastly.net/ml/7140723-f-c4a51a70-e81b-4beb-877f-6892b886dfe6.png?width=214&height=454)