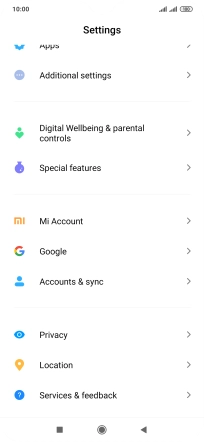
1. Find "Date & time"
Press Settings.
![](http://wmstatic.global.ssl.fastly.net/ml/7140723-f-846f314a-ff76-4cdb-83a4-54c089633530.png?width=204&height=446)
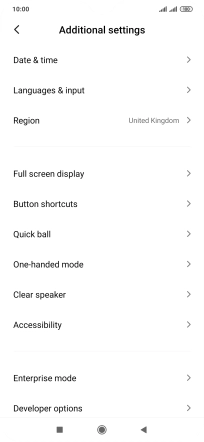
Press Additional settings.
![](http://wmstatic.global.ssl.fastly.net/ml/7140723-f-53162a3b-d4df-4661-bc0d-86021309d709.png?width=204&height=446)
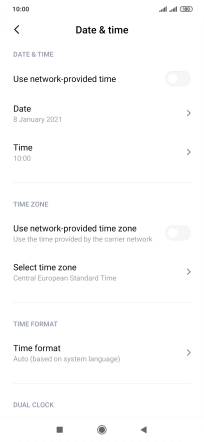
Press Date & time.
![](http://wmstatic.global.ssl.fastly.net/ml/7140723-f-0a88e4a3-57f0-41a9-b7c1-5b60eb09e983.png?width=204&height=446)
2. Turn on automatic date and time update
Press the indicator next to "Use network-provided time" to turn on the function.
![](http://wmstatic.global.ssl.fastly.net/ml/7140723-f-c60626e6-1303-4f14-bc27-7ee948503194.png?width=204&height=446)
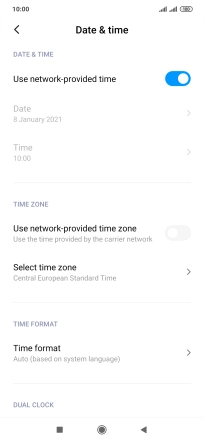
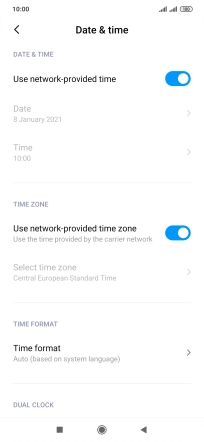
3. Turn on automatic time zone update
Press the indicator next to "Use network-provided time zone" to turn on the function.
![](http://wmstatic.global.ssl.fastly.net/ml/7140723-f-3930cef7-2500-450d-95e0-f6eb30a63833.png?width=204&height=446)
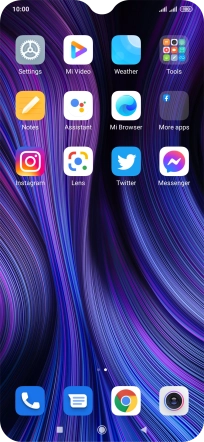
4. Return to the home screen
Press the Home key to return to the home screen.
![](http://wmstatic.global.ssl.fastly.net/ml/7140723-f-a170cafc-b427-4a5b-bc1d-119924bdd387.png?width=204&height=446)