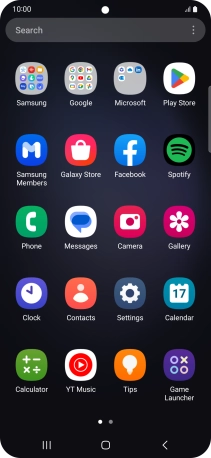
1. Find "Contacts"
Slide your finger upwards on the screen.
![](http://wmstatic.global.ssl.fastly.net/ml/7210823-f-a3819dcd-490c-44a3-a7cc-4accc06038b8.png?width=212&height=458)
Press Contacts.
![](http://wmstatic.global.ssl.fastly.net/ml/7210823-f-33507cfd-5748-4c5d-ab6b-47530a62e972.png?width=212&height=458)
2. Create contact
Press the new contact icon.
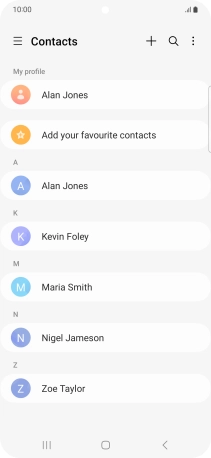
![](http://wmstatic.global.ssl.fastly.net/ml/7210823-f-449d6122-9638-43c7-8573-7ebd26afd79d.png?width=212&height=458)
3. Select address book
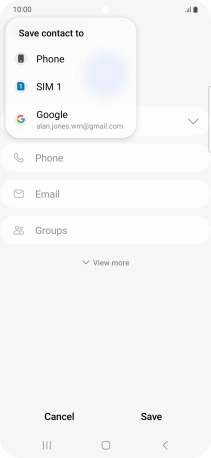
Press the address book drop down list.
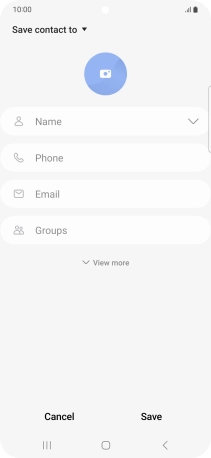
![](http://wmstatic.global.ssl.fastly.net/ml/7210823-f-49800712-7388-402d-afa2-5c6031110152.png?width=212&height=458)
Press the required Google account.
![](http://wmstatic.global.ssl.fastly.net/ml/7210823-f-7ab3c92d-55a0-4377-bce9-a4df5b3bbffe.png?width=212&height=458)
4. Enter name
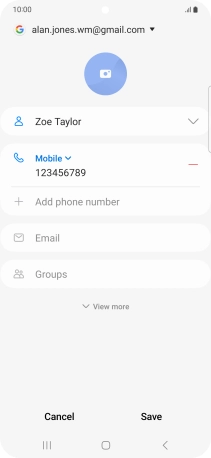
Press Name and key in the required name.
![](http://wmstatic.global.ssl.fastly.net/ml/7210823-f-49800712-7388-402d-afa2-5c6031110152.png?width=212&height=458)
5. Enter phone number
Press Phone and key in the required phone number.
Follow the instructions on the screen to add more information such as email address and date of birth.
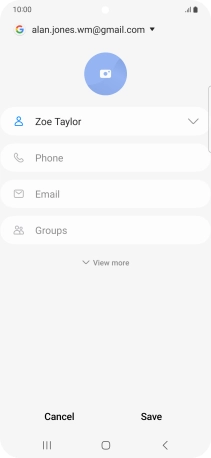
![](http://wmstatic.global.ssl.fastly.net/ml/7210823-f-ca6401a1-f129-407d-8084-8dcb698dfb6c.png?width=212&height=458)
6. Save contact
Press Save.
![](http://wmstatic.global.ssl.fastly.net/ml/7210823-f-b11c7029-90b7-49e7-975b-a638410c02c6.png?width=212&height=458)
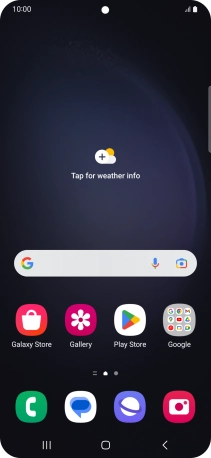
7. Return to the home screen
Press the Home key to return to the home screen.
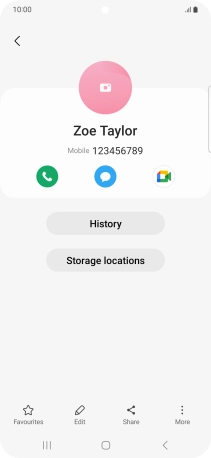
![](http://wmstatic.global.ssl.fastly.net/ml/7210823-f-4bf0aa45-4eb6-4e48-9f84-a8c73c3546a7.png?width=212&height=458)