1. Find "Accounts"
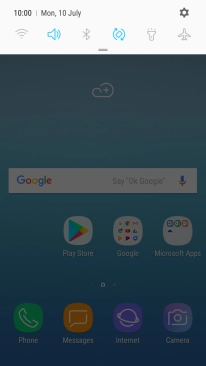
Slide your finger downwards starting from the top of the screen.
![](http://wmstatic.global.ssl.fastly.net/ml/7140723-f-e4104666-cfae-4a73-852a-06f55f906bfc.png?width=206&height=368)
Press the settings icon.
![](http://wmstatic.global.ssl.fastly.net/ml/7140723-f-cb28a6d2-03ab-4122-b037-9688c51ef7c0.png?width=206&height=368)
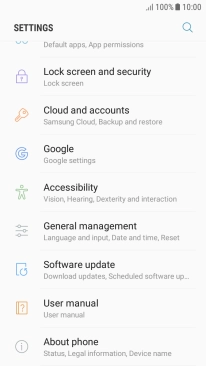
Press Cloud and accounts.
![](http://wmstatic.global.ssl.fastly.net/ml/7140723-f-0f0ab07f-4f01-436f-b8e0-223fdb318345.png?width=206&height=368)
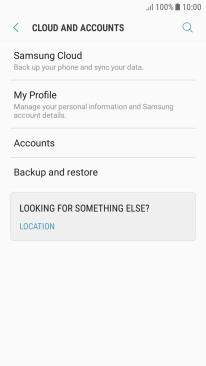
Press Accounts.
![](http://wmstatic.global.ssl.fastly.net/ml/7140723-f-496005d6-edb4-44a3-a2ba-f6087a5ffe4e.png?width=206&height=368)
2. Turn on automatic content synchronisation
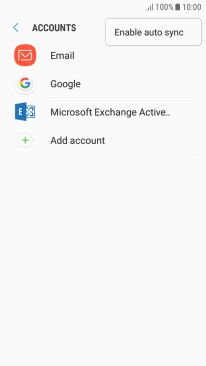
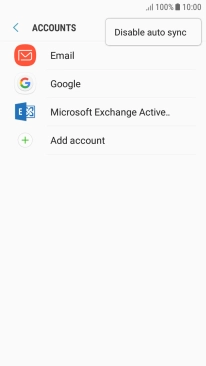
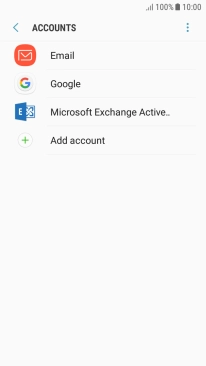
Press the menu icon.
![](http://wmstatic.global.ssl.fastly.net/ml/7140723-f-462cfa8f-56a4-4c9d-97ca-0f8385a37886.png?width=206&height=368)
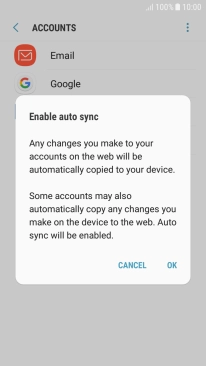
Press Enable auto sync.
![](http://wmstatic.global.ssl.fastly.net/ml/7140723-f-cfc7d803-afd5-40df-9ee1-363245075078.png?width=206&height=368)
Press OK.
![](http://wmstatic.global.ssl.fastly.net/ml/7140723-f-717c4c54-53f1-4161-9e03-d7d8d885f5fd.png?width=206&height=368)
3. Turn off automatic content synchronisation
Press the menu icon.
![](http://wmstatic.global.ssl.fastly.net/ml/7140723-f-462cfa8f-56a4-4c9d-97ca-0f8385a37886.png?width=206&height=368)
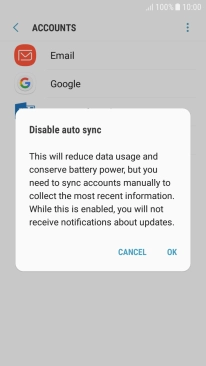
Press Disable auto sync.
![](http://wmstatic.global.ssl.fastly.net/ml/7140723-f-af7c1755-cc67-474c-980d-2271627b8acf.png?width=206&height=368)
Press OK.
![](http://wmstatic.global.ssl.fastly.net/ml/7140723-f-ed4e640b-a6aa-4411-beb6-ed02b251b9f1.png?width=206&height=368)
4. Return to the home screen
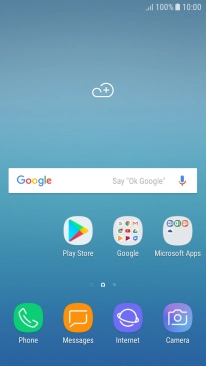
Press the Home key to return to the home screen.
![](http://wmstatic.global.ssl.fastly.net/ml/7140723-f-462cfa8f-56a4-4c9d-97ca-0f8385a37886.png?width=206&height=368)