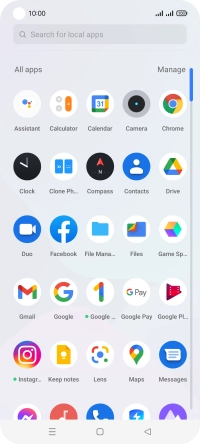
1. Find "Contacts"
Slide your finger upwards on the screen.
![](http://wmstatic.global.ssl.fastly.net/ml/7140723-f-4d2fc1db-6e43-4e50-b03e-12f04abcc3a8.png?width=200&height=448)
Press Contacts.
![](http://wmstatic.global.ssl.fastly.net/ml/7140723-f-c7d89206-a705-40ee-b7f3-7ef84f885ef7.png?width=200&height=448)
2. Create contact
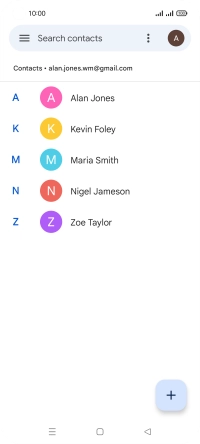
Press the new contact icon.
![](http://wmstatic.global.ssl.fastly.net/ml/7140723-f-6d189b51-0273-4261-ae0e-de7777c50fc1.png?width=200&height=448)
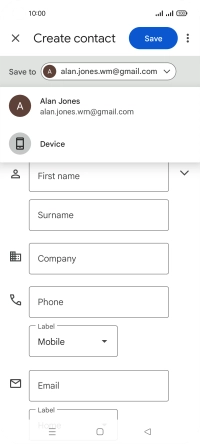
3. Select address book
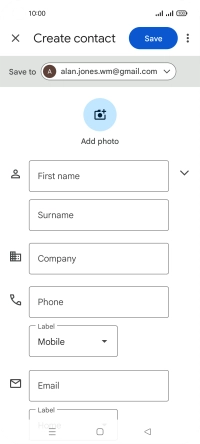
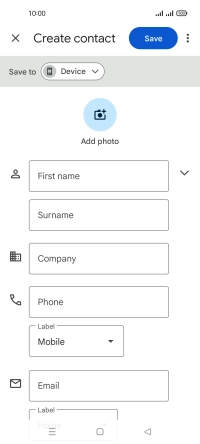
Press the drop down list next to "Save to".
![](http://wmstatic.global.ssl.fastly.net/ml/7140723-f-43c1f248-866e-482e-ae7d-3fb1a250efab.png?width=200&height=448)
Press Device.
![](http://wmstatic.global.ssl.fastly.net/ml/7140723-f-b8c5926c-285b-4609-aa11-25bc30ae893a.png?width=200&height=448)
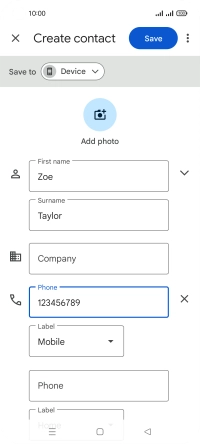
4. Enter name
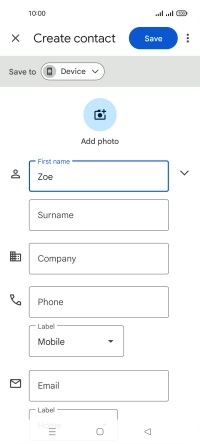
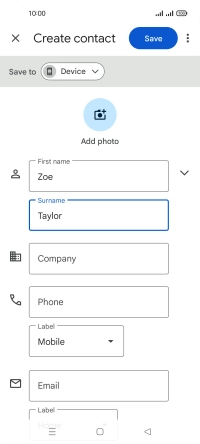
Press First name and key in the required first name.
![](http://wmstatic.global.ssl.fastly.net/ml/7140723-f-743ec6c2-28de-44fc-aca1-b898ddb4abb2.png?width=200&height=448)
Press Surname and key in the required last name.
![](http://wmstatic.global.ssl.fastly.net/ml/7140723-f-9677aeb4-9ea0-46b3-93e7-b2ea726432a2.png?width=200&height=448)
5. Enter phone number
Press Phone and key in the required phone number.
Follow the instructions on the screen to add more information such as an email address and a personal ring tone.
![](http://wmstatic.global.ssl.fastly.net/ml/7140723-f-5e4072da-1592-4b1c-9aab-15386bd02009.png?width=200&height=448)
6. Save contact
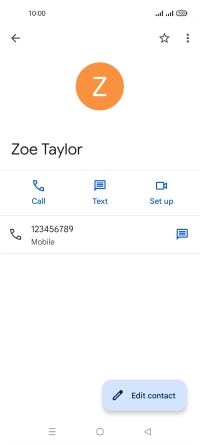
Press Save.
![](http://wmstatic.global.ssl.fastly.net/ml/7140723-f-650717f8-0320-4156-8bd0-0f6a43718e57.png?width=200&height=448)
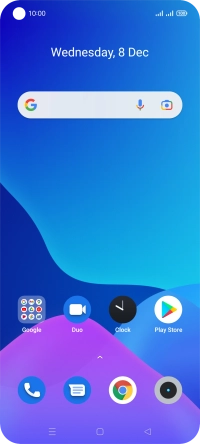
7. Return to the home screen
Press the Home key to return to the home screen.
![](http://wmstatic.global.ssl.fastly.net/ml/7140723-f-3d958373-f43a-481d-ad3a-8c104c0e43c9.png?width=200&height=448)