Apple iPhone 13 mini

Apple iPhone 13 mini

I can't send and receive email messages on my Apple iPhone 13 mini iOS 15.0

Cause 2 of 3: Your phone hasn't been correctly set up for IMAP email

To send and receive email messages using IMAP, your phone needs to be correctly set up for email.

Solution: Set up your phone for IMAP email.

Step 1 of 43

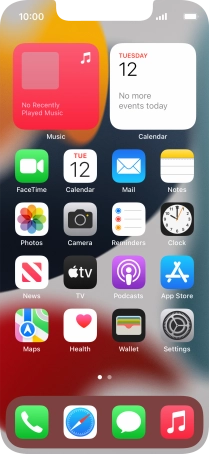
Find "Accounts"

Press Settings.

Step 2 of 43

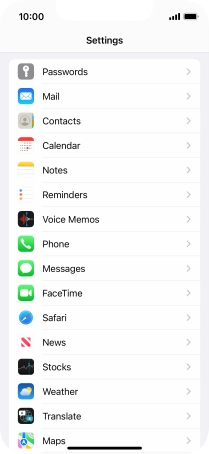
Find "Accounts"

Press Mail.

Step 3 of 43

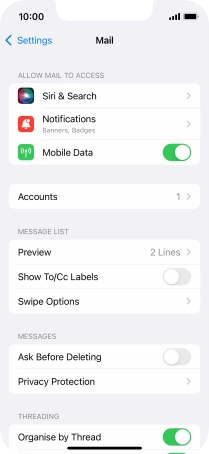
Find "Accounts"

Press Accounts.

Step 4 of 43

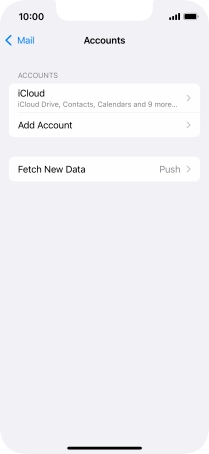
Create new email account

Press Add Account.

Step 5 of 43

Create new email account

Press Other.

Step 6 of 43

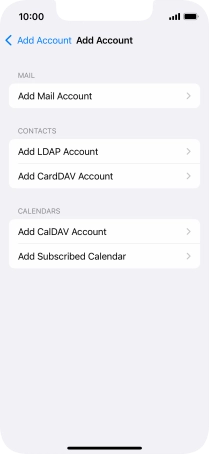
Create new email account

Press Add Mail Account.

Step 7 of 43

Enter sender name

Press Name and key in the required sender name.

Step 8 of 43

Enter email address

Press Email and key in your email address.

Step 9 of 43

Enter password

Press Password and key in the password for your email account.

Step 10 of 43

Enter email account name

Press Description and key in the required name.

Step 11 of 43

Enter email account name

Press Next.

Step 12 of 43

Enter email account name

If this screen is displayed, you email account has been recognised and set up automatically. Follow the instructions on the screen to key in more information and finish setting up your phone.

Step 13 of 43

Select server type

Press IMAP.

Step 14 of 43

Enter incoming server

Press Host Name and key in the name of your email provider's incoming server.

Step 15 of 43

Enter username

Press Username and key in the username for your email account.

mail.vodafone.ie
Step 16 of 43

Enter outgoing server

Press Host Name and key in mail.vodafone.ie.

Step 17 of 43

Enter outgoing server

Press Next.

Step 18 of 43

Enter outgoing server

Press Save. Your email account has now been set up. To select more settings for incoming and outgoing server, proceed with the following steps.

Step 19 of 43

Select email account

Press the name of the email account you've just set up.

Step 20 of 43

Select email account

Press Account.

Step 21 of 43

Turn off encryption of outgoing email messages

Press SMTP.

Step 22 of 43

Turn off encryption of outgoing email messages

Press the field below "PRIMARY SERVER".

Step 23 of 43

Turn off encryption of outgoing email messages

Press the indicator next to "Use SSL" to turn off the function.

Step 24 of 43

Turn off password encryption

Press Authentication.

Step 25 of 43

Turn off password encryption

Press Password.

Step 26 of 43

Turn off password encryption

Press arrow left.

25
Step 27 of 43

Enter outgoing port

Press Server Port and key in 25.

Step 28 of 43

Enter outgoing port

Press Done.

Step 29 of 43

Enter outgoing port

Press arrow left.

Step 30 of 43

Turn off encryption of incoming email messages

Press Advanced.

Step 31 of 43

Turn off encryption of incoming email messages

Press the indicator next to "Use SSL" to turn off the function.

Step 32 of 43

Turn off password encryption

Press Authentication.

Step 33 of 43

Turn off password encryption

Press Password.

Step 34 of 43

Turn off password encryption

Press arrow left.

143
Step 35 of 43

Enter incoming port

Press Server Port and key in 143.

Step 36 of 43

Enter incoming port

Press arrow left.

Step 37 of 43

Enter incoming port

Press Done.

Step 38 of 43

Enter incoming port

Press arrow left.

Step 39 of 43

Select setting for retrieval of new email messages

Press Fetch New Data.

Step 40 of 43

Select setting for retrieval of new email messages

Press the indicator next to "Push" to turn the function on or off.

Step 41 of 43

Select setting for retrieval of new email messages

If you turn off the function, press the required setting.

Step 42 of 43

Select setting for retrieval of new email messages

Press the required email account and follow the instructions on the screen to select settings for the specific account.

Step 43 of 43

Return to the home screen

Slide your finger upwards starting from the bottom of the screen to return to the home screen.

1 Find "Accounts"

Press Settings.
Press Mail.
Press Accounts.
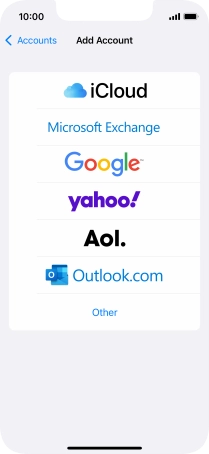
2 Create new email account

Press Add Account.
Press Other.
If the name of your email provider is on the list, press this instead.
Press Add Mail Account.
3 Enter sender name

Press Name and key in the required sender name.
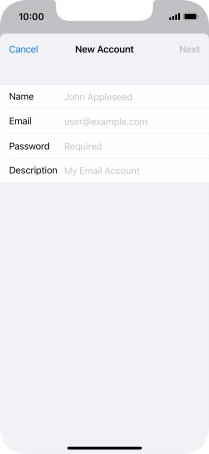
4 Enter email address

Press Email and key in your email address.
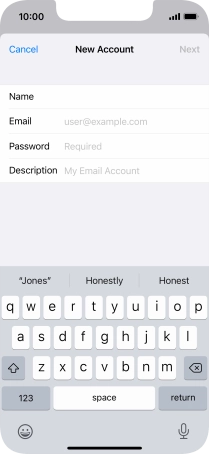
5 Enter password

Press Password and key in the password for your email account.
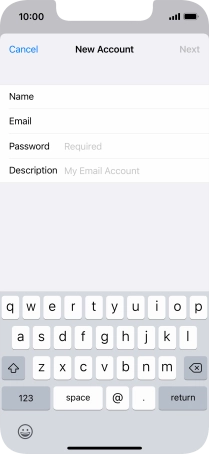
6 Enter email account name

Press Description and key in the required name.
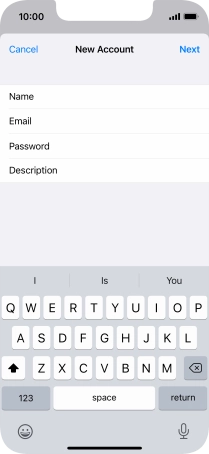
Press Next.
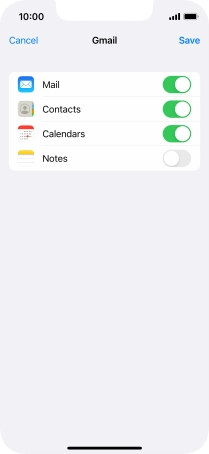
If this screen is displayed, you email account has been recognised and set up automatically. Follow the instructions on the screen to key in more information and finish setting up your phone.
7 Select server type

Press IMAP.
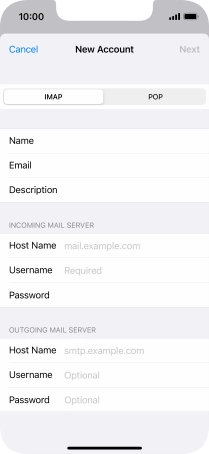
8 Enter incoming server

Press Host Name and key in the name of your email provider's incoming server.

9 Enter username

Press Username and key in the username for your email account.
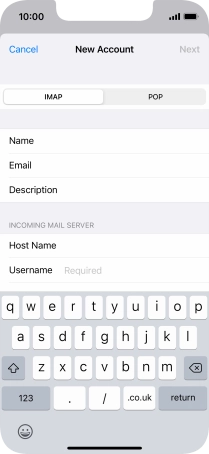
10 Enter outgoing server

Press Host Name and key in mail.vodafone.ie.
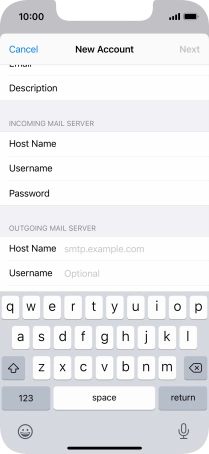
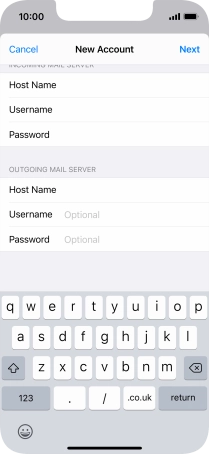
mail.vodafone.ie
Press Next.
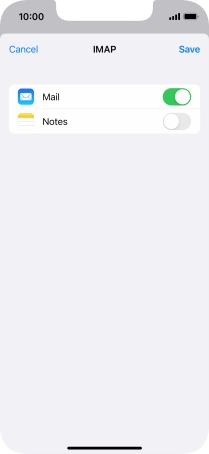
Press Save. Your email account has now been set up. To select more settings for incoming and outgoing server, proceed with the following steps.
11 Select email account

Press the name of the email account you've just set up.
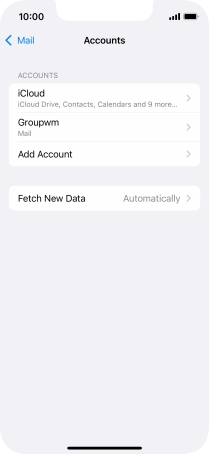
Press Account.
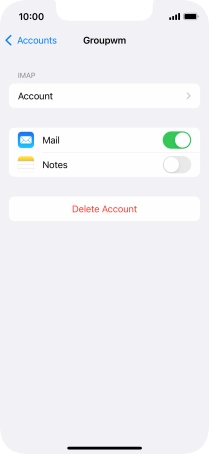
12 Turn off encryption of outgoing email messages

Press SMTP.
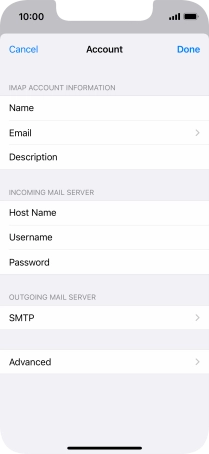
Press the field below "PRIMARY SERVER".
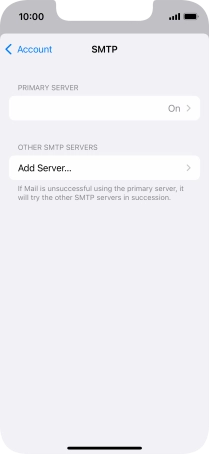
Press the indicator next to "Use SSL" to turn off the function.
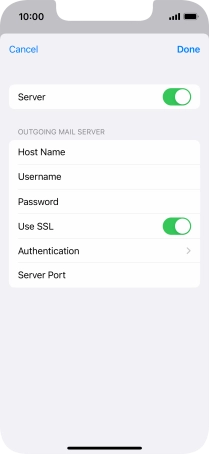
13 Turn off password encryption

Press Authentication.
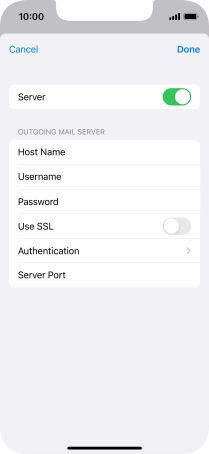
Press Password.
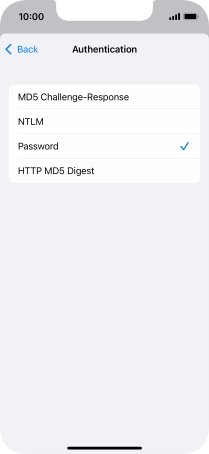
Press arrow left.

14 Enter outgoing port

Press Server Port and key in 25.
25
Press Done.
Press arrow left.

15 Turn off encryption of incoming email messages

Press Advanced.
Press the indicator next to "Use SSL" to turn off the function.
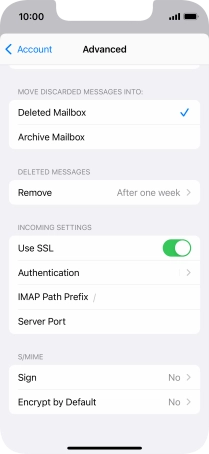
16 Turn off password encryption

Press Authentication.
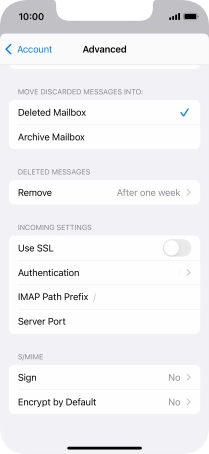
Press Password.
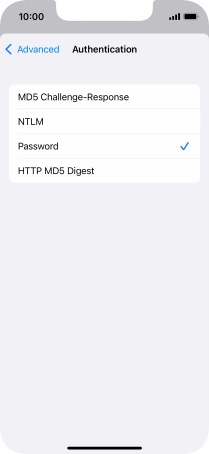
Press arrow left.

17 Enter incoming port

Press Server Port and key in 143.
143
Press arrow left.
Press Done.
Press arrow left.

18 Select setting for retrieval of new email messages

Press Fetch New Data.
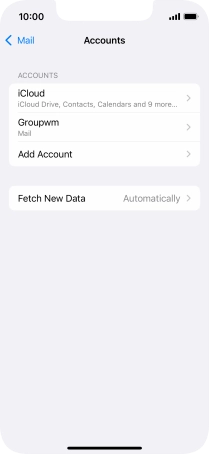
Press the indicator next to "Push" to turn the function on or off.
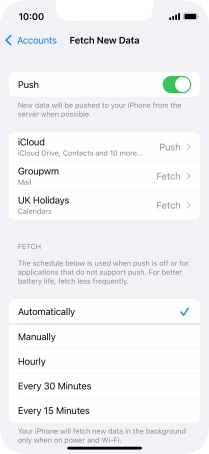
If you turn off the function, press the required setting.
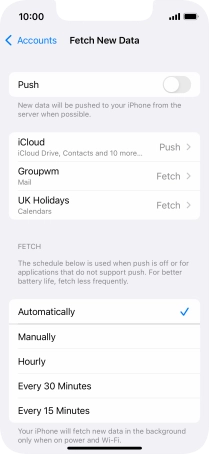
Press the required email account and follow the instructions on the screen to select settings for the specific account.

19 Return to the home screen

Slide your finger upwards starting from the bottom of the screen to return to the home screen.

Did this solve the problem?

Yes - All solved No - Go to next cause

Get information on...

Or select...

Another device
4g accessories icon-app-store basket-change battery-life battery bill-pay-phones-icon 4C91DB73-75FE-4565-8F69-BC6C675B1EA1 bin block Brands broadband-icon broadband calendar call camera cases Chat chevron-down chevron-left chevron-right chevron-up close close collections€€ community continuous contract dashboard data download-square Download edit error-circle eye facebook filters folder go identity Less letters location Memory menu message mobile my-vodafone network_signal operating-system orders payg-phones-icon F86C85F6-FFFF-4C62-8F9A-45D7251FC836 payment photos play-store play plus rating report return roaming screen-size search secure-net shopping sim spinner squares technology tick-simple top-up top-up TV twitter value vf-tv-icon vodafone warning Weight world
Close dialog
Skip to content

Login to My Vodafone

Close dialog
Skip to content

Register with My Vodafone