1. Find "Screen Time"
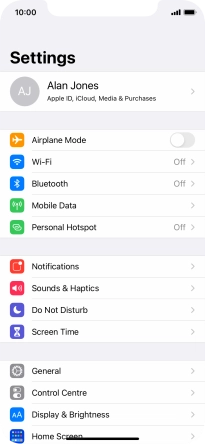
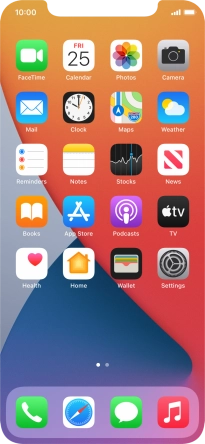
Press Settings.
![](http://wmstatic.global.ssl.fastly.net/ml/7140723-f-eb555ab4-f8d1-4bdd-b616-012ba4481188.png?width=206&height=444)
Press Screen Time.
![](http://wmstatic.global.ssl.fastly.net/ml/7140723-f-bb717be5-ed7c-407c-bb1d-ab51bfcf7c3c.png?width=206&height=444)
2. Turn on Screen Time
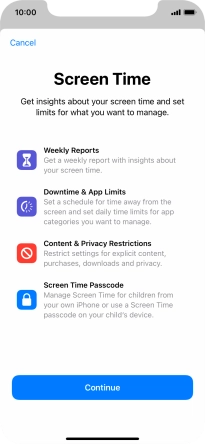
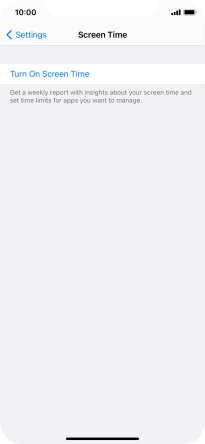
Press Turn On Screen Time.
![](http://wmstatic.global.ssl.fastly.net/ml/7140723-f-98de40c8-d9d2-4537-86fd-699eee1db197.png?width=206&height=444)
Press Continue.
![](http://wmstatic.global.ssl.fastly.net/ml/7140723-f-a1cb01b1-a8d6-428e-81da-e59a9e1aee49.png?width=206&height=444)
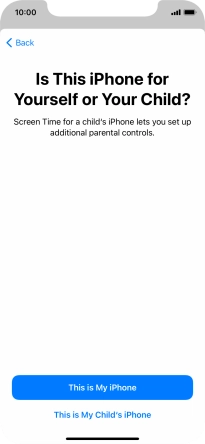
Press This is My iPhone.
![](http://wmstatic.global.ssl.fastly.net/ml/7140723-f-ce44c75b-88fd-4058-92f7-93e7ff1ec892.png?width=206&height=444)
3. Select Downtime settings
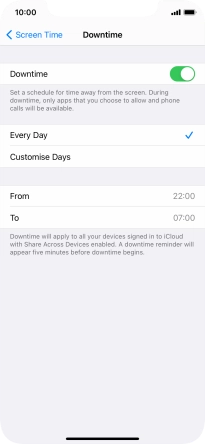
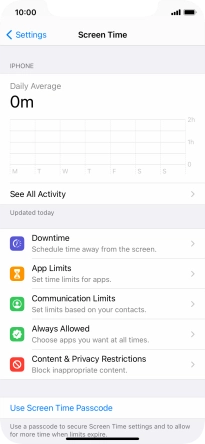
Press Downtime.
![](http://wmstatic.global.ssl.fastly.net/ml/7140723-f-dd7ad3c8-a4b9-4ba0-a22c-e3be275cc18a.png?width=206&height=444)
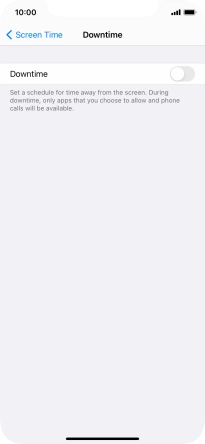
Press the indicator next to "Downtime" and follow the instructions on the screen to select Downtime period.
During Downtime only calls and allowed apps will be available.
![](http://wmstatic.global.ssl.fastly.net/ml/7140723-f-921d4940-6cc4-4c04-b17f-58739c9a4971.png?width=206&height=444)
Press arrow left.
![](http://wmstatic.global.ssl.fastly.net/ml/7140723-f-49cb8667-722b-4103-9205-f21ac3c17fc5.png?width=206&height=444)
4. Select time limits for app usage
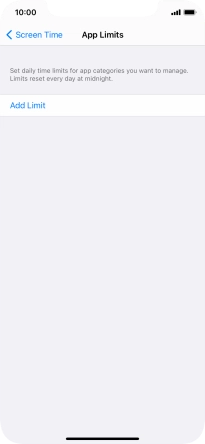
Press App Limits.
![](http://wmstatic.global.ssl.fastly.net/ml/7140723-f-dd7ad3c8-a4b9-4ba0-a22c-e3be275cc18a.png?width=206&height=444)
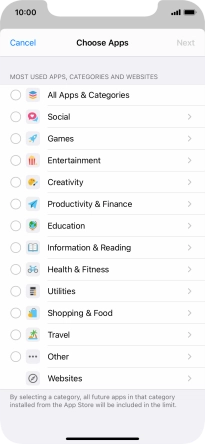
Press Add Limit.
![](http://wmstatic.global.ssl.fastly.net/ml/7140723-f-015c5372-b13a-45f3-bf3c-82cd5a8dabec.png?width=206&height=444)
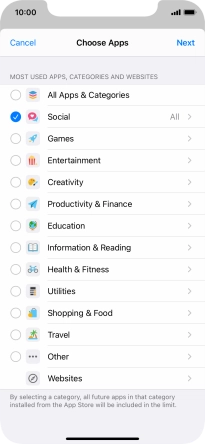
Press the required categories.
![](http://wmstatic.global.ssl.fastly.net/ml/7140723-f-90a897fa-ad6b-4ccd-9022-c7c627691bd3.png?width=206&height=444)
Press Next.
![](http://wmstatic.global.ssl.fastly.net/ml/7140723-f-27c39d7d-15d0-4b84-8fa0-23a7b32951da.png?width=206&height=444)
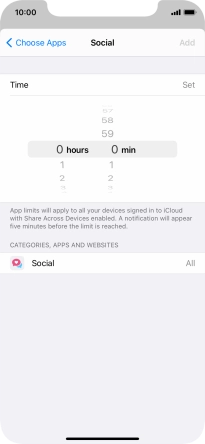
Set the required time limit for use of the selected category.
![](http://wmstatic.global.ssl.fastly.net/ml/7140723-f-1d374a01-0833-4320-8332-5ae94181b090.png?width=206&height=444)
5. Select days for time limits of app usage
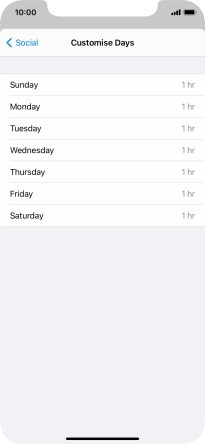
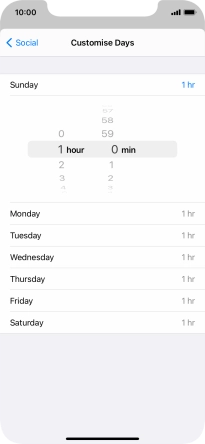
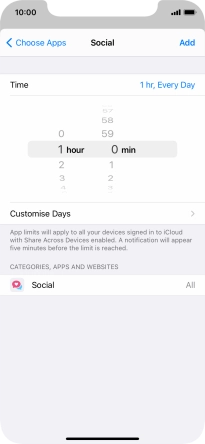
Press Customise Days.
![](http://wmstatic.global.ssl.fastly.net/ml/7140723-f-56551cb1-91cf-4680-b657-04299b113baa.png?width=206&height=444)
Press the required days.
![](http://wmstatic.global.ssl.fastly.net/ml/7140723-f-21e17b98-11e6-4f52-8073-09438cff349d.png?width=206&height=444)
Select the required time limit.
![](http://wmstatic.global.ssl.fastly.net/ml/7140723-f-53717bbb-8ad2-408b-8409-e642d744b6ea.png?width=206&height=444)
Press arrow left.
![](http://wmstatic.global.ssl.fastly.net/ml/7140723-f-53717bbb-8ad2-408b-8409-e642d744b6ea.png?width=206&height=444)
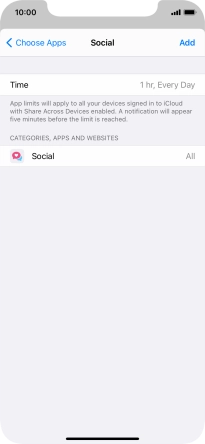
Press Add.
![](http://wmstatic.global.ssl.fastly.net/ml/7140723-f-03c12c3d-e52b-4ab3-9c90-70bd28ca8196.png?width=206&height=444)
6. Delete time limits for app usage
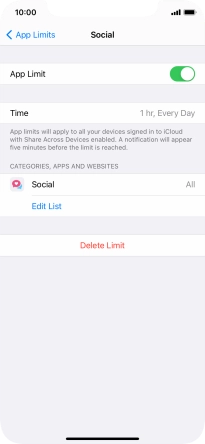
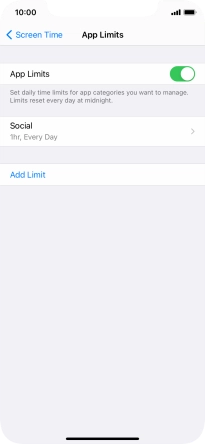
Press the required category.
![](http://wmstatic.global.ssl.fastly.net/ml/7140723-f-4385cd58-0cdf-4bcd-81ab-9e673e7e5b93.png?width=206&height=444)
Press Delete Limit.
![](http://wmstatic.global.ssl.fastly.net/ml/7140723-f-947ca3d7-7633-4c3e-a4e0-29695e2c2052.png?width=206&height=444)
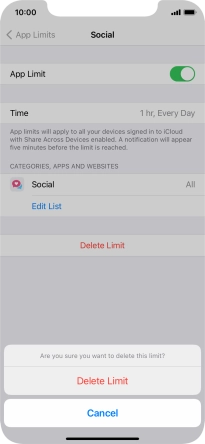
Press Delete Limit.
![](http://wmstatic.global.ssl.fastly.net/ml/7140723-f-36eb715c-d59c-4569-9c0f-7421e01a0a01.png?width=206&height=444)
Press arrow left.
![](http://wmstatic.global.ssl.fastly.net/ml/7140723-f-015c5372-b13a-45f3-bf3c-82cd5a8dabec.png?width=206&height=444)
7. Select communication limits during Screen Time
Press Communication Limits.
![](http://wmstatic.global.ssl.fastly.net/ml/7140723-f-dd7ad3c8-a4b9-4ba0-a22c-e3be275cc18a.png?width=206&height=444)
Press During Screen Time.
![](http://wmstatic.global.ssl.fastly.net/ml/7140723-f-c3d77b5e-6ef5-44f3-b88e-63d8d453b401.png?width=206&height=444)
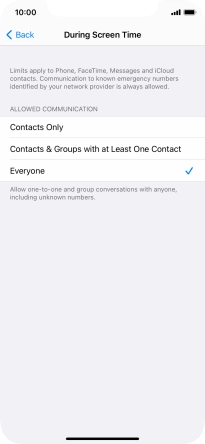
Press the required setting.
During Screen Time, only communication with allowed contacts is available.
![](http://wmstatic.global.ssl.fastly.net/ml/7140723-f-7c754a5e-3f17-4a43-a6cc-6ad2b92e2e7e.png?width=206&height=444)
Press arrow left.
![](http://wmstatic.global.ssl.fastly.net/ml/7140723-f-7c754a5e-3f17-4a43-a6cc-6ad2b92e2e7e.png?width=206&height=444)
8. Select communication limits during Downtime
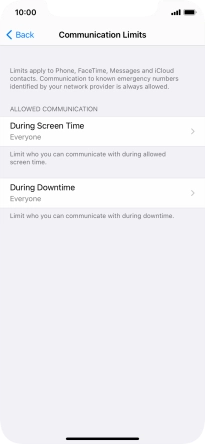
Press During Downtime.
![](http://wmstatic.global.ssl.fastly.net/ml/7140723-f-c3d77b5e-6ef5-44f3-b88e-63d8d453b401.png?width=206&height=444)
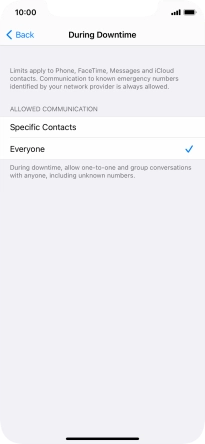
Press the required setting.
During Downtime, only communication with allowed contacts is available.
![](http://wmstatic.global.ssl.fastly.net/ml/7140723-f-67876a1a-f10a-46ba-9960-bdf435c6b0c1.png?width=206&height=444)
If you select Specific Contacts, follow the instructions on the screen to select the required contacts.
![](http://wmstatic.global.ssl.fastly.net/ml/7140723-f-67876a1a-f10a-46ba-9960-bdf435c6b0c1.png?width=206&height=444)
Press arrow left.
![](http://wmstatic.global.ssl.fastly.net/ml/7140723-f-67876a1a-f10a-46ba-9960-bdf435c6b0c1.png?width=206&height=444)
Press arrow left.
![](http://wmstatic.global.ssl.fastly.net/ml/7140723-f-c3d77b5e-6ef5-44f3-b88e-63d8d453b401.png?width=206&height=444)
9. Select apps that can be used during Downtime
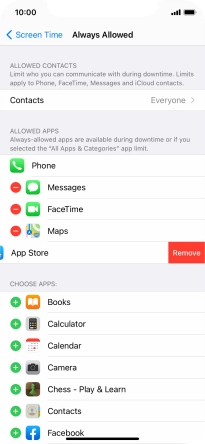
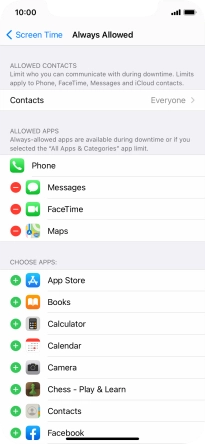
Press Always Allowed.
![](http://wmstatic.global.ssl.fastly.net/ml/7140723-f-dd7ad3c8-a4b9-4ba0-a22c-e3be275cc18a.png?width=206&height=444)
Press the add icon next to the required app to add it to the list of allowed apps during Downtime.
![](http://wmstatic.global.ssl.fastly.net/ml/7140723-f-374e1214-65bd-4095-9427-7ebc34fa2105.png?width=206&height=444)
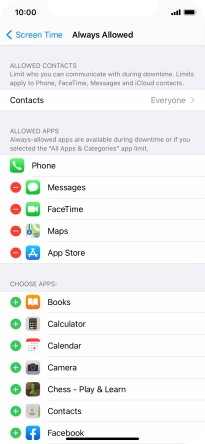
Press the remove icon next to the required app to remove it from the list of allowed apps during Downtime.
![](http://wmstatic.global.ssl.fastly.net/ml/7140723-f-79d2e893-7914-4f77-b027-91ee9ecc743f.png?width=206&height=444)
Press Remove.
![](http://wmstatic.global.ssl.fastly.net/ml/7140723-f-21e09c1a-29c2-41de-b5c3-c119e276efb4.png?width=206&height=444)
Press arrow left.
![](http://wmstatic.global.ssl.fastly.net/ml/7140723-f-374e1214-65bd-4095-9427-7ebc34fa2105.png?width=206&height=444)
10. Select settings for content and restrictions
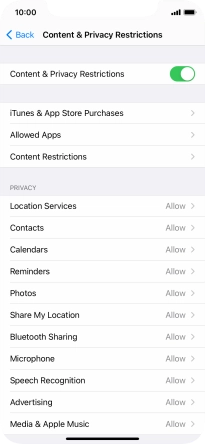
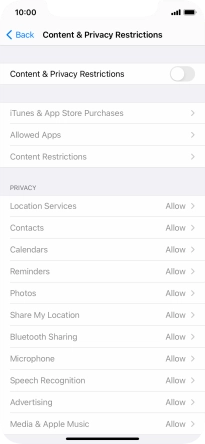
Press Content & Privacy Restrictions.
![](http://wmstatic.global.ssl.fastly.net/ml/7140723-f-dd7ad3c8-a4b9-4ba0-a22c-e3be275cc18a.png?width=206&height=444)
Press the indicator next to "Content & Privacy Restrictions" and follow the instructions on the screen to select settings for content and privacy restrictions.
![](http://wmstatic.global.ssl.fastly.net/ml/7140723-f-fdfc4db3-c39b-4f10-8823-15b7b4bbee88.png?width=206&height=444)
Press arrow left.
![](http://wmstatic.global.ssl.fastly.net/ml/7140723-f-f0042499-917f-45bd-a548-1940d9b33ba7.png?width=206&height=444)
11. Turn on use of password
Press Use Screen Time Passcode and follow the instructions on the screen to select a Screen Time password.
If you turn on the function, you need to key in the password to access Screen Time settings.
![](http://wmstatic.global.ssl.fastly.net/ml/7140723-f-dd7ad3c8-a4b9-4ba0-a22c-e3be275cc18a.png?width=206&height=444)
12. Return to the home screen
Slide your finger upwards starting from the bottom of the screen to return to the home screen.
![](http://wmstatic.global.ssl.fastly.net/ml/7140723-f-dd7ad3c8-a4b9-4ba0-a22c-e3be275cc18a.png?width=206&height=444)