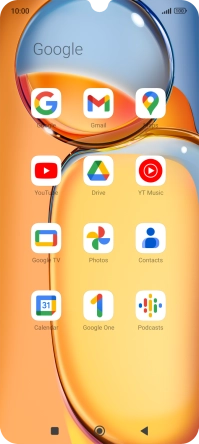
1. Find "Contacts"
Press Google.
![](http://wmstatic.global.ssl.fastly.net/ml/7090424-f-65de04ef-a7bb-40cc-a646-625c0507267f.png?width=200&height=444)
Press Contacts.
![](http://wmstatic.global.ssl.fastly.net/ml/7090424-f-582c9ce6-2216-4206-96fe-4321d74731fe.png?width=200&height=444)
2. Create contact
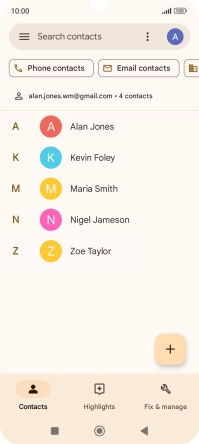
Press the new contact icon.
![](http://wmstatic.global.ssl.fastly.net/ml/7090424-f-79f3fa5b-9e49-40bc-a00a-b5eb6e68e8b7.png?width=200&height=444)
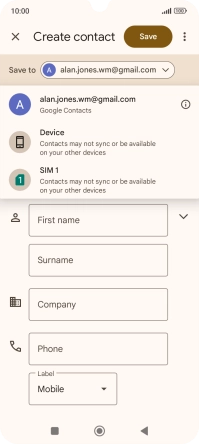
3. Select address book
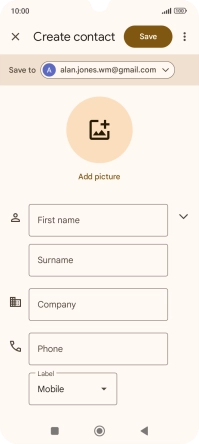
Press the drop down list next to "Save to".
![](http://wmstatic.global.ssl.fastly.net/ml/7090424-f-d0bf87ed-c645-4761-8504-34b7eebf96e9.png?width=200&height=444)
Press the required Google account.
![](http://wmstatic.global.ssl.fastly.net/ml/7090424-f-08be273b-2fa5-47fa-b919-1c3fdd069856.png?width=200&height=444)
4. Enter name
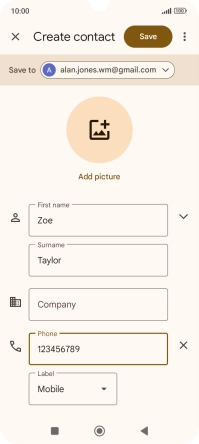
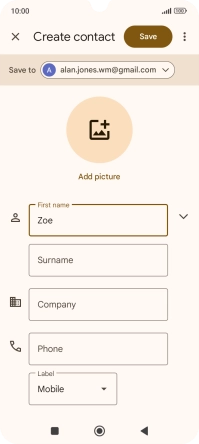
Press First name and key in the required first name.
![](http://wmstatic.global.ssl.fastly.net/ml/7090424-f-d0bf87ed-c645-4761-8504-34b7eebf96e9.png?width=200&height=444)
Press Surname and key in the required last name.
![](http://wmstatic.global.ssl.fastly.net/ml/7090424-f-4fa30432-4cd8-4b8f-89eb-d35cab7ba7ef.png?width=200&height=444)
5. Enter phone number
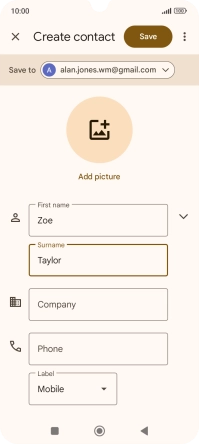
Press Phone and key in the required phone number.
Follow the instructions on the screen to add more information such as email address and date of birth.
![](http://wmstatic.global.ssl.fastly.net/ml/7090424-f-fc3c5d81-a905-49e2-bf85-1a553f053e54.png?width=200&height=444)
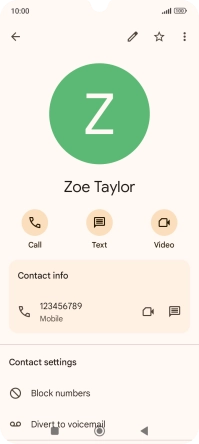
6. Save contact
Press Save.
![](http://wmstatic.global.ssl.fastly.net/ml/7090424-f-3dd4451f-8f64-43f3-9d78-050f053eb761.png?width=200&height=444)
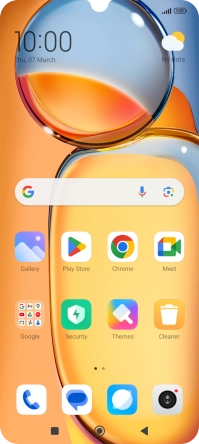
7. Return to the home screen
Press the Home key to return to the home screen.
![](http://wmstatic.global.ssl.fastly.net/ml/7090424-f-ebdbfaaf-256a-4d05-b15d-e6b464895b03.png?width=200&height=444)