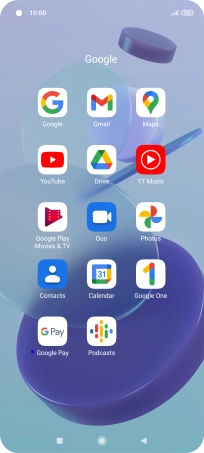
1. Find "Contacts"
Press Google.
![](http://wmstatic.global.ssl.fastly.net/ml/7140723-f-1d4cc364-798b-4c24-8ce9-2447f5ec5630.png?width=204&height=456)
Press Contacts.
![](http://wmstatic.global.ssl.fastly.net/ml/7140723-f-346a8367-396c-46f8-b8f4-7853158c0ae5.png?width=204&height=456)
2. Create contact
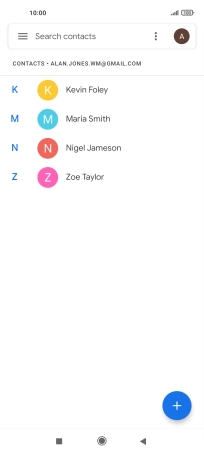
Press the new contact icon.
![](http://wmstatic.global.ssl.fastly.net/ml/7140723-f-8f0ae7a5-6245-4060-880e-454a0d2d65ff.png?width=204&height=456)
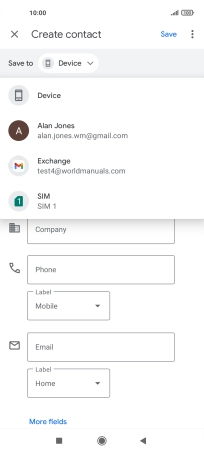
3. Select address book
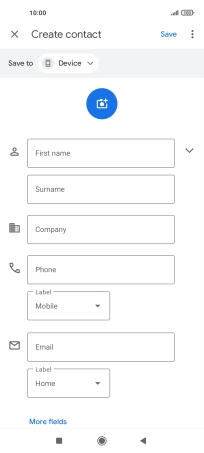
Press the drop down list next to "Save to".
![](http://wmstatic.global.ssl.fastly.net/ml/7140723-f-f6824483-9b4d-47a9-883a-386e95950a26.png?width=204&height=456)
Press Device.
![](http://wmstatic.global.ssl.fastly.net/ml/7140723-f-90206302-51e5-4e28-9a44-458b3010fe95.png?width=204&height=456)
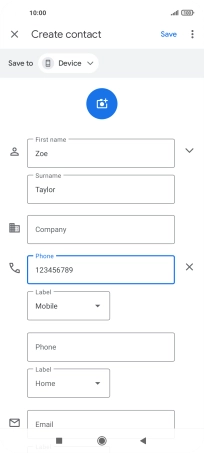
4. Enter name
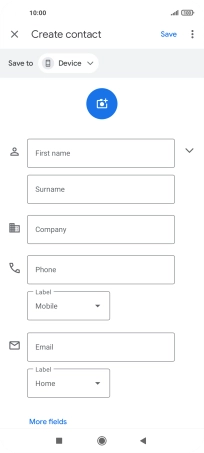
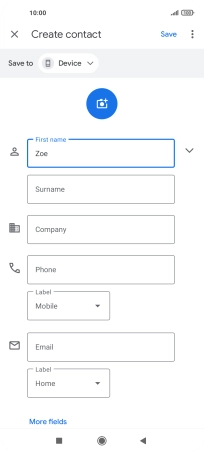
Press First name and key in the required first name.
![](http://wmstatic.global.ssl.fastly.net/ml/7140723-f-a39a389a-3757-4f7a-bc0c-f50420951e45.png?width=204&height=456)
Press Surname and key in the required last name.
![](http://wmstatic.global.ssl.fastly.net/ml/7140723-f-0cd69afd-ecff-44eb-b7a6-4feddd8a608f.png?width=204&height=456)
5. Enter phone number
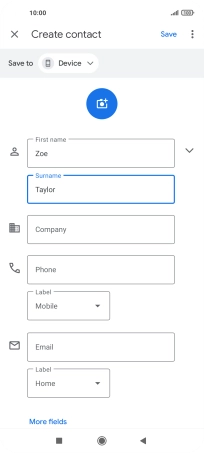
Press Phone and key in the required phone number.
Follow the instructions on the screen to add more information such as an email address and a personal ring tone.
![](http://wmstatic.global.ssl.fastly.net/ml/7140723-f-f7de5626-6463-41eb-8b5e-143d30043785.png?width=204&height=456)
6. Save contact
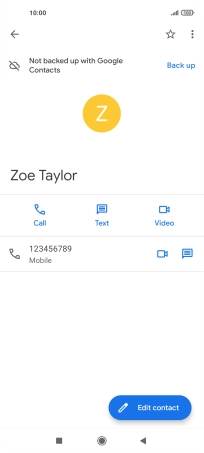
Press Save.
![](http://wmstatic.global.ssl.fastly.net/ml/7140723-f-f3310fd9-0f81-48ce-88f8-29d3a47079a4.png?width=204&height=456)
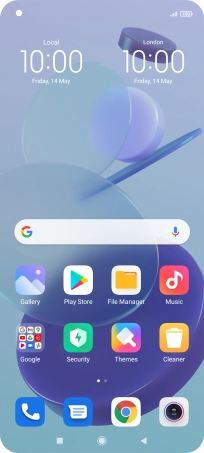
7. Return to the home screen
Press the Home key to return to the home screen.
![](http://wmstatic.global.ssl.fastly.net/ml/7140723-f-4969aad3-78fb-4bab-bc43-96266843828c.png?width=204&height=456)