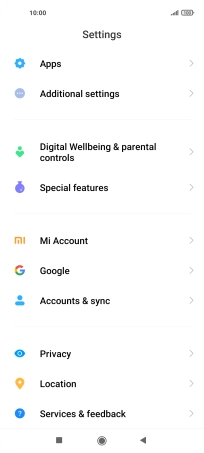
1. Find "Date and time"
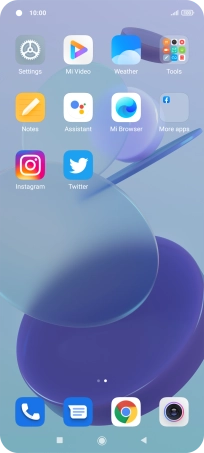
Press Settings.
![](http://wmstatic.global.ssl.fastly.net/ml/7140723-f-32c75d03-10b2-4797-abef-3a36148e6379.png?width=204&height=456)
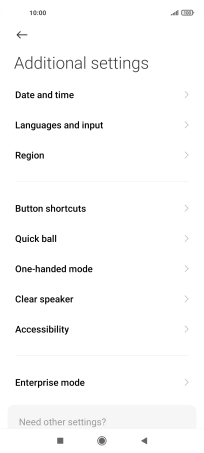
Press Additional settings.
![](http://wmstatic.global.ssl.fastly.net/ml/7140723-f-235ba669-0b05-4835-bb02-171ddd8569a2.png?width=204&height=456)
Press Date and time.
![](http://wmstatic.global.ssl.fastly.net/ml/7140723-f-5a3fd6fb-78c9-4aa9-994e-792e5d391e8f.png?width=204&height=456)
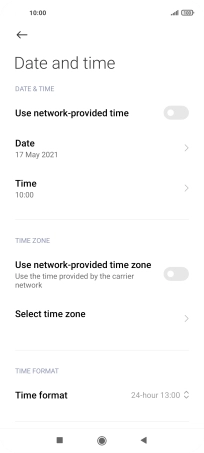
2. Turn on automatic date and time update
Press the indicator next to "Use network-provided time" to turn on the function.
![](http://wmstatic.global.ssl.fastly.net/ml/7140723-f-ac3a7749-ae3d-4e7e-bb62-574770af76d3.png?width=204&height=456)
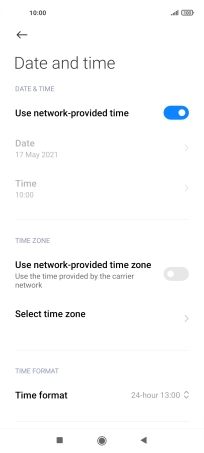
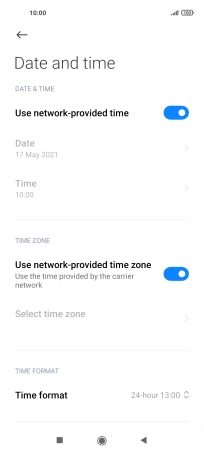
3. Turn on automatic time zone update
Press the indicator next to "Use network-provided time zone" to turn on the function.
![](http://wmstatic.global.ssl.fastly.net/ml/7140723-f-eaa62807-14c6-4f68-9d8f-1c80625bd81f.png?width=204&height=456)
4. Return to the home screen
Press the Home key to return to the home screen.
![](http://wmstatic.global.ssl.fastly.net/ml/7140723-f-9f32cd2a-545c-42b9-872b-3bb46fb265c9.png?width=204&height=456)