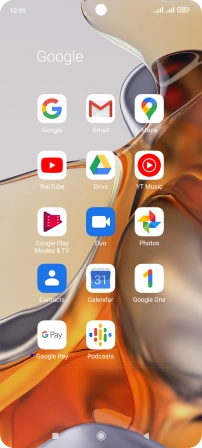
1. Find "Contacts"
Press Google.
![](http://wmstatic.global.ssl.fastly.net/ml/7140723-f-a9dfda55-27c3-47ea-9885-eca213f720f5.png?width=202&height=452)
Press Contacts.
![](http://wmstatic.global.ssl.fastly.net/ml/7140723-f-4931d8e3-affc-4a5f-8bfa-73e02b39298c.png?width=202&height=452)
2. Create contact
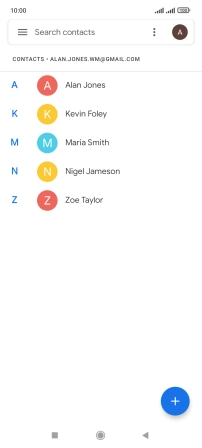
Press the new contact icon.
![](http://wmstatic.global.ssl.fastly.net/ml/7140723-f-f5c7be94-733a-4966-a6b5-0d52f617c315.png?width=202&height=452)
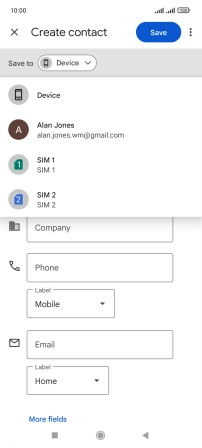
3. Select address book
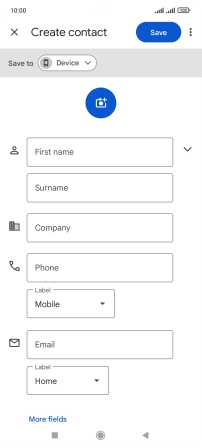
Press the drop down list next to "Save to".
![](http://wmstatic.global.ssl.fastly.net/ml/7140723-f-aadc3c99-f1c2-48bf-b691-8e44cf071c4f.png?width=202&height=452)
Press Device.
![](http://wmstatic.global.ssl.fastly.net/ml/7140723-f-dcaeaa3b-4b26-4965-bac0-f708ee8115e2.png?width=202&height=452)
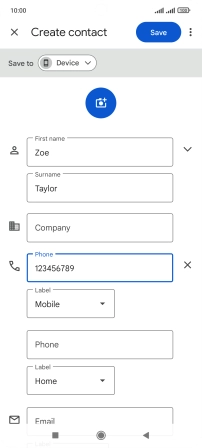
4. Enter name
Press First name and key in the required first name.
![](http://wmstatic.global.ssl.fastly.net/ml/7140723-f-aadc3c99-f1c2-48bf-b691-8e44cf071c4f.png?width=202&height=452)
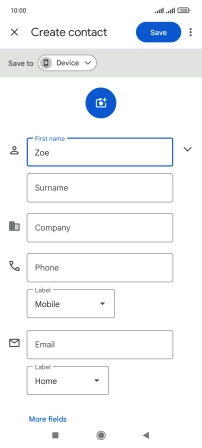
Press Surname and key in the required last name.
![](http://wmstatic.global.ssl.fastly.net/ml/7140723-f-d0687016-3a4d-444d-83c1-270be46a7863.png?width=202&height=452)
5. Enter phone number
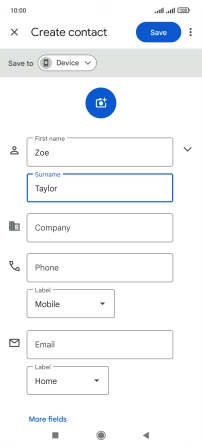
Press Phone and key in the required phone number.
Follow the instructions on the screen to add more information such as an email address and a personal ring tone.
![](http://wmstatic.global.ssl.fastly.net/ml/7140723-f-b8a4cf62-cdfb-4ff6-beb6-f57c2be9d8a0.png?width=202&height=452)
6. Save contact
Press Save.
![](http://wmstatic.global.ssl.fastly.net/ml/7140723-f-3d6b9687-80db-4e62-91d2-3edf14bf50cd.png?width=202&height=452)
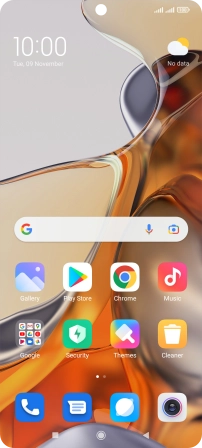
7. Return to the home screen
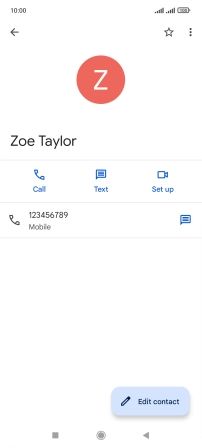
Press the Home key to return to the home screen.
![](http://wmstatic.global.ssl.fastly.net/ml/7140723-f-7d3e5ae9-08ed-4c3b-9dc2-86565e84f070.png?width=202&height=452)