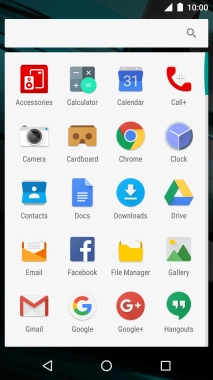
1. Find "Contacts"
Press the main menu icon.
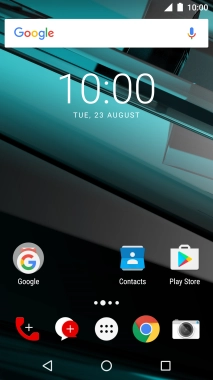
![](http://wmstatic.global.ssl.fastly.net/ml/7140723-f-577f3e21-22e1-47c7-a5fb-6c551a6aa716.png?width=214&height=380)
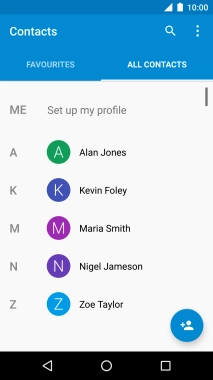
Press Contacts.
![](http://wmstatic.global.ssl.fastly.net/ml/7140723-f-5cb2d547-a0d7-4af3-9537-cc6cc24f5caa.png?width=214&height=380)
2. Create contact
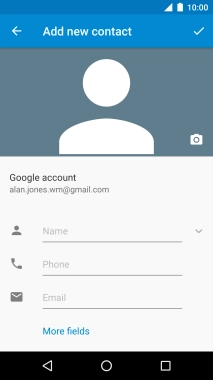
Press the new contact icon.
![](http://wmstatic.global.ssl.fastly.net/ml/7140723-f-bca154fb-411e-4e0a-9d76-5211dbf93898.png?width=214&height=380)
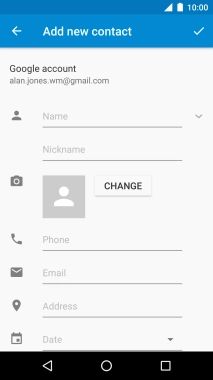
Press More fields.
![](http://wmstatic.global.ssl.fastly.net/ml/7140723-f-5881eb95-8d84-4434-a821-d7b04d60b3fa.png?width=214&height=380)
3. Enter name
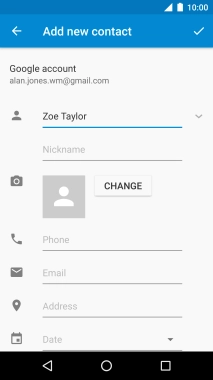
Press Name and key in the name.
![](http://wmstatic.global.ssl.fastly.net/ml/7140723-f-41b5f4ca-2052-4127-ac03-82a4f907a807.png?width=214&height=380)
4. Add picture
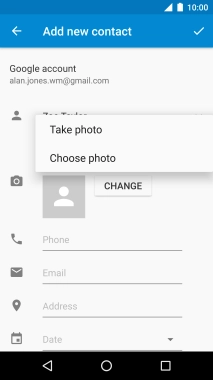
Press CHANGE.
![](http://wmstatic.global.ssl.fastly.net/ml/7140723-f-1e5d24a7-0049-4191-8c18-37fa0dee748e.png?width=214&height=380)
Press Choose photo.
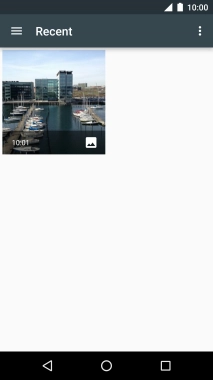
![](http://wmstatic.global.ssl.fastly.net/ml/7140723-f-b47c75e2-3ce3-424b-9a0b-b6bf112d7e02.png?width=214&height=380)
Slide your finger right starting from the left side of the screen.
![](http://wmstatic.global.ssl.fastly.net/ml/7140723-f-6c742739-299c-42ef-ad39-7943752164e1.png?width=214&height=380)
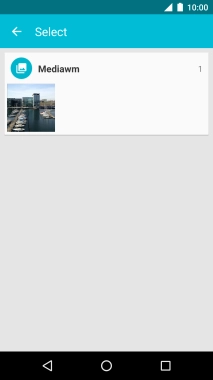
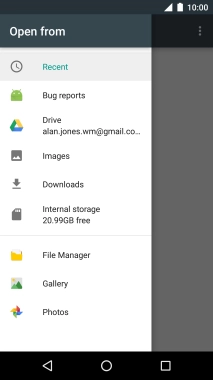
Press Gallery and go to the required folder.
![](http://wmstatic.global.ssl.fastly.net/ml/7140723-f-9ff92de6-4550-4c89-a7f7-a85dae59721b.png?width=214&height=380)
Press the required picture.
![](http://wmstatic.global.ssl.fastly.net/ml/7140723-f-2125eb20-5144-4540-b757-9f7bcc3bf089.png?width=214&height=380)
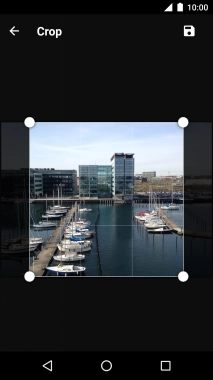
Drag the frame to the required position to select the required detail and press the save icon.
![](http://wmstatic.global.ssl.fastly.net/ml/7140723-f-b4cc4269-b967-46fe-aa0a-b4729657f5fe.png?width=214&height=380)
5. Enter phone number
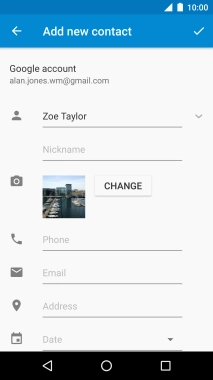
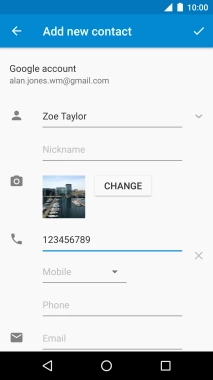
Press Phone and key in the required phone number.
![](http://wmstatic.global.ssl.fastly.net/ml/7140723-f-14179cae-3f79-4248-ab14-a750997aa15a.png?width=214&height=380)
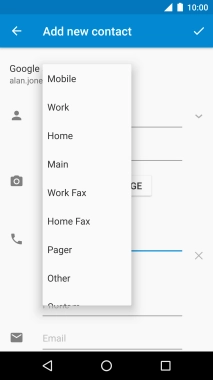
Press the drop down list below the phone number.
![](http://wmstatic.global.ssl.fastly.net/ml/7140723-f-a3eadd52-6cc9-430d-86f0-f96973139641.png?width=214&height=380)
Press the required number type.
![](http://wmstatic.global.ssl.fastly.net/ml/7140723-f-90e6c015-3aa5-4f1c-a5d7-42a2964ca373.png?width=214&height=380)
6. Enter email address
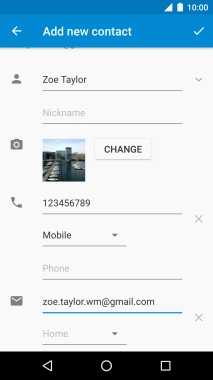
Press Email and key in the required email address.
![](http://wmstatic.global.ssl.fastly.net/ml/7140723-f-a3eadd52-6cc9-430d-86f0-f96973139641.png?width=214&height=380)
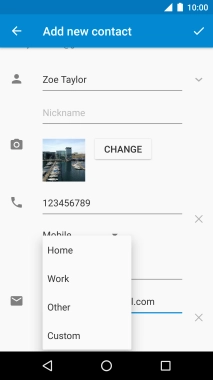
Press the drop down list below the email address.
![](http://wmstatic.global.ssl.fastly.net/ml/7140723-f-04296cd9-3188-44a1-9adf-73e7415b5d03.png?width=214&height=380)
Press the required email type.
![](http://wmstatic.global.ssl.fastly.net/ml/7140723-f-4e024e75-2114-4e62-8e36-e9d811821732.png?width=214&height=380)
7. Save contact
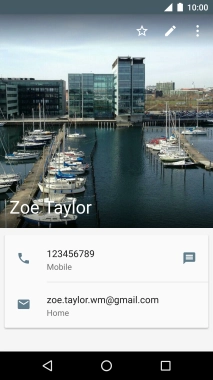
Press the save icon.
![](http://wmstatic.global.ssl.fastly.net/ml/7140723-f-04296cd9-3188-44a1-9adf-73e7415b5d03.png?width=214&height=380)
8. Assign a ring tone
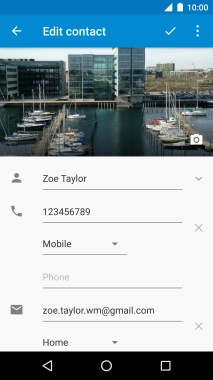
Press the edit icon.
![](http://wmstatic.global.ssl.fastly.net/ml/7140723-f-07d683ba-68bc-4fed-bf2c-f7366262be64.png?width=214&height=380)
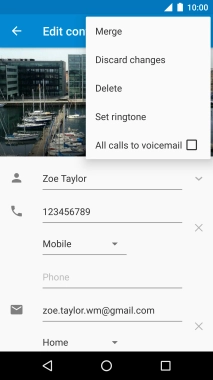
Press the menu icon.
![](http://wmstatic.global.ssl.fastly.net/ml/7140723-f-baba7d57-1487-46f2-ab81-2d1a6fab6009.png?width=214&height=380)
Press Set ringtone.
![](http://wmstatic.global.ssl.fastly.net/ml/7140723-f-1d3cd51d-596d-4d25-8e14-f7cfab2f8bae.png?width=214&height=380)
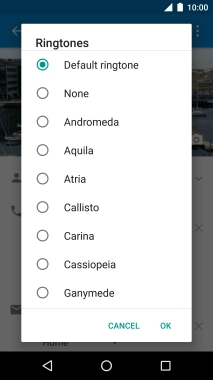
Press the required ring tones to hear them.
![](http://wmstatic.global.ssl.fastly.net/ml/7140723-f-6cff343e-2fb4-4e75-aabc-427cca87c41e.png?width=214&height=380)
Once you've found a ring tone you like, press OK.
![](http://wmstatic.global.ssl.fastly.net/ml/7140723-f-6cff343e-2fb4-4e75-aabc-427cca87c41e.png?width=214&height=380)
Press the save icon.
![](http://wmstatic.global.ssl.fastly.net/ml/7140723-f-baba7d57-1487-46f2-ab81-2d1a6fab6009.png?width=214&height=380)
9. Return to the home screen
Press the Home key to return to the home screen.
![](http://wmstatic.global.ssl.fastly.net/ml/7140723-f-07d683ba-68bc-4fed-bf2c-f7366262be64.png?width=214&height=380)