


1. Find "Date & time"
Slide your finger downwards starting from the top of the screen.


1. Find "Date & time"
Press the settings icon.


1. Find "Date & time"
Press Date & time.


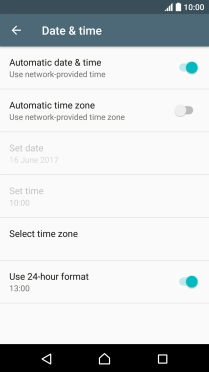
2. Turn on automatic date and time update
Press the indicator next to "Automatic date & time" to turn on the function.


3. Turn on automatic time zone update
Press the indicator next to "Automatic time zone" to turn on the function.


4. Return to the home screen
Press the Home key to return to the home screen.
1. Find "Date & time"


2. Turn on automatic date and time update

3. Turn on automatic time zone update
4. Return to the home screen
