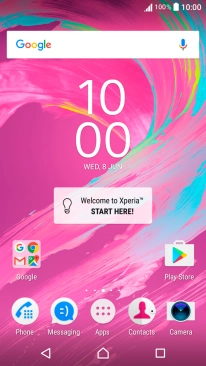
1. Open the address book
Press Contacts.
![](http://wmstatic.global.ssl.fastly.net/ml/7140723-f-88d20c03-b386-4471-bab9-2c03b0421dc7.png?width=206&height=368)
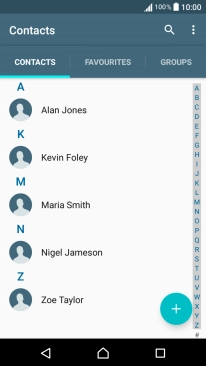
2. Create contact
Press the new contact icon.
![](http://wmstatic.global.ssl.fastly.net/ml/7140723-f-dedd3012-ff67-420c-a61a-a9c363186687.png?width=206&height=368)
3. Add picture
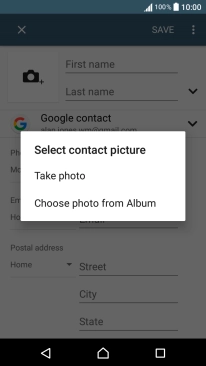
Press the picture icon.
![](http://wmstatic.global.ssl.fastly.net/ml/7140723-f-0110a0e3-a651-4483-b7f5-186ac45ac403.png?width=206&height=368)
Press Choose photo from Album and go to the required folder.
![](http://wmstatic.global.ssl.fastly.net/ml/7140723-f-ab0506f8-2265-46c4-b9a5-563424e371f8.png?width=206&height=368)
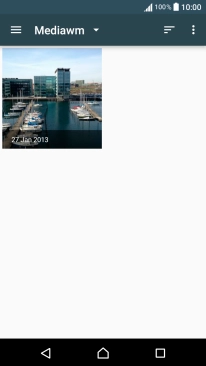
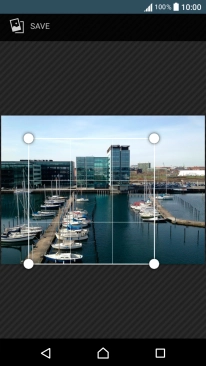
Press the required picture.
![](http://wmstatic.global.ssl.fastly.net/ml/7140723-f-ad37c1d6-7367-4975-8b4b-777ca48adaed.png?width=206&height=368)
Drag the frame to the required position to select the required detail and press SAVE.
![](http://wmstatic.global.ssl.fastly.net/ml/7140723-f-d9c2f09a-3735-4761-a032-e91308b660d0.png?width=206&height=368)
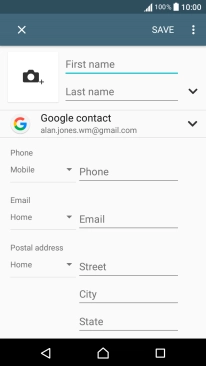
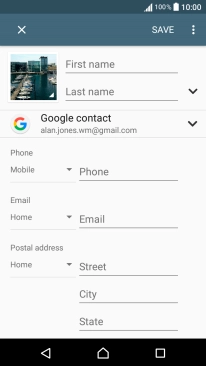
4. Enter name
Press First name and key in the first name.
![](http://wmstatic.global.ssl.fastly.net/ml/7140723-f-f41cf6a8-c4fb-4741-8dee-af1df66caea8.png?width=206&height=368)
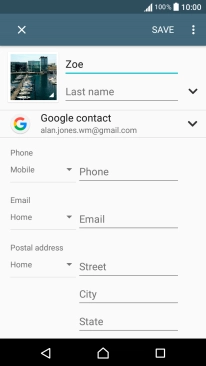
Press Last name and key in the last name.
![](http://wmstatic.global.ssl.fastly.net/ml/7140723-f-3d425691-df23-4ff2-a7a1-901f6b949558.png?width=206&height=368)
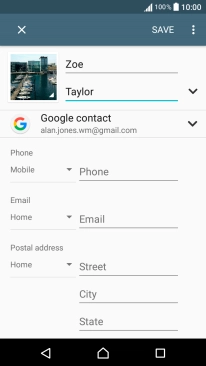
5. Select address book
Press the address book drop down list.
![](http://wmstatic.global.ssl.fastly.net/ml/7140723-f-08ac1fee-940e-4552-8b9f-ea0ac5ecb2cc.png?width=206&height=368)
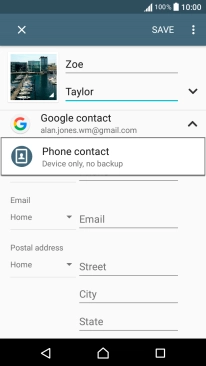
Press Phone contact.
![](http://wmstatic.global.ssl.fastly.net/ml/7140723-f-2a98e767-2953-419c-8c58-bb7a1d9cc8f8.png?width=206&height=368)
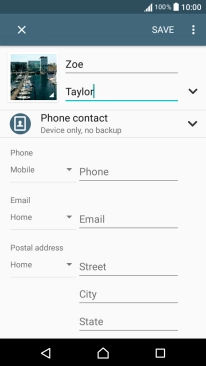
6. Enter phone number
Press Phone and key in the required phone number.
![](http://wmstatic.global.ssl.fastly.net/ml/7140723-f-9132eaaf-1d36-495b-aba3-8e53ccd1e472.png?width=206&height=368)
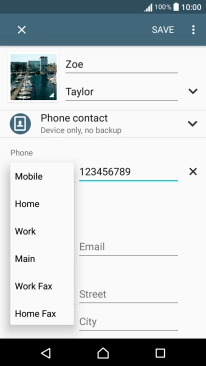
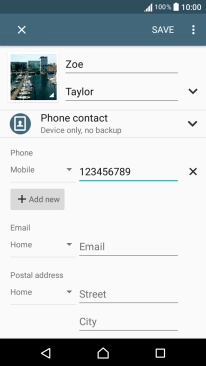
Press the drop down list next to the phone number.
![](http://wmstatic.global.ssl.fastly.net/ml/7140723-f-f10521ad-f454-413f-b5f0-6875ec387a62.png?width=206&height=368)
Press the required number type.
![](http://wmstatic.global.ssl.fastly.net/ml/7140723-f-bbab879d-2943-441b-a24b-9c5a22788142.png?width=206&height=368)
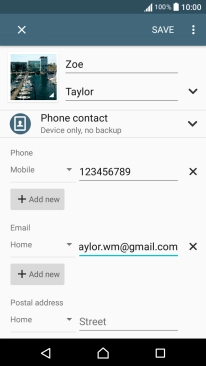
7. Enter email address
Press Email and key in the required email address.
![](http://wmstatic.global.ssl.fastly.net/ml/7140723-f-f10521ad-f454-413f-b5f0-6875ec387a62.png?width=206&height=368)
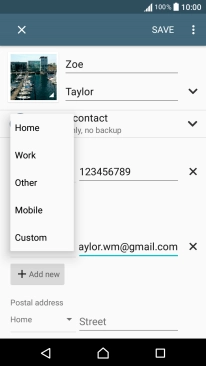
Press the drop down list next to the email address.
![](http://wmstatic.global.ssl.fastly.net/ml/7140723-f-09162dc0-f0e2-4ec1-a96f-b1ac458178cb.png?width=206&height=368)
Press the required email type.
![](http://wmstatic.global.ssl.fastly.net/ml/7140723-f-fede0eea-ebfb-4942-b457-611c2f2808a4.png?width=206&height=368)
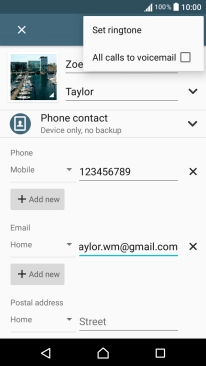
8. Assign a ring tone
Press the menu icon.
![](http://wmstatic.global.ssl.fastly.net/ml/7140723-f-09162dc0-f0e2-4ec1-a96f-b1ac458178cb.png?width=206&height=368)
Press Set ringtone.
![](http://wmstatic.global.ssl.fastly.net/ml/7140723-f-f6bb26d5-b9dc-46a0-8c84-49a7a8551f1e.png?width=206&height=368)
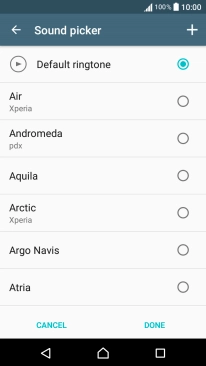
Press the required ring tones to hear them.
![](http://wmstatic.global.ssl.fastly.net/ml/7140723-f-f97a2790-18d0-484b-b07b-d6ee3160730e.png?width=206&height=368)
Once you've found a ring tone you like, press DONE.
![](http://wmstatic.global.ssl.fastly.net/ml/7140723-f-f97a2790-18d0-484b-b07b-d6ee3160730e.png?width=206&height=368)
9. Save contact
Press SAVE.
![](http://wmstatic.global.ssl.fastly.net/ml/7140723-f-09162dc0-f0e2-4ec1-a96f-b1ac458178cb.png?width=206&height=368)
10. Return to the home screen
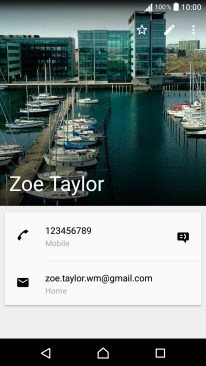
Press the Home key to return to the home screen.
![](http://wmstatic.global.ssl.fastly.net/ml/7140723-f-c99f3058-934c-40ca-8b2b-33f41f06cc0a.png?width=206&height=368)