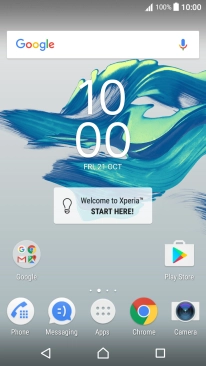
1. Find "Account & sync"
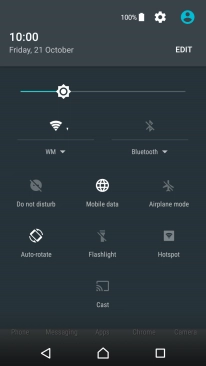
Slide two fingers downwards starting from the top the screen.
![](http://wmstatic.global.ssl.fastly.net/ml/7140723-f-244c6685-c21e-45c4-8928-1ffb13ce8c8c.png?width=206&height=368)
Press the settings icon.
![](http://wmstatic.global.ssl.fastly.net/ml/7140723-f-d019cf85-7ffe-4552-8790-276e5971703a.png?width=206&height=368)
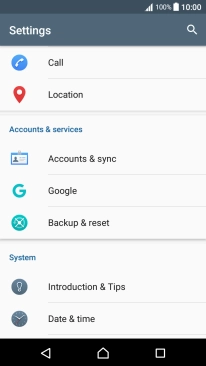
Press Account & sync.
![](http://wmstatic.global.ssl.fastly.net/ml/7140723-f-4becdfb0-f919-4c92-936b-b197553430f4.png?width=206&height=368)
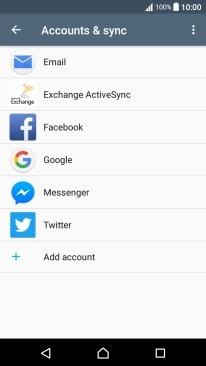
2. Turn on content synchronisation
Press the menu icon.
![](http://wmstatic.global.ssl.fastly.net/ml/7140723-f-0d240e57-ea4c-420c-9e4e-249c4396f83e.png?width=206&height=368)
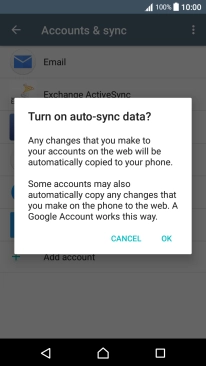
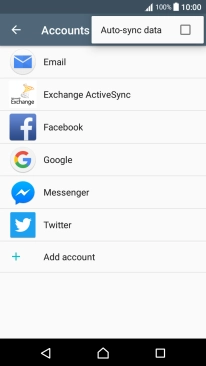
Press Auto-sync data to turn on the function.
![](http://wmstatic.global.ssl.fastly.net/ml/7140723-f-9f446828-78ab-46a5-8994-f8981a7692c9.png?width=206&height=368)
Press OK.
![](http://wmstatic.global.ssl.fastly.net/ml/7140723-f-3978ebfb-ff8c-416a-ae86-6714ce3326a4.png?width=206&height=368)
3. Turn off content synchronisation
Press the menu icon.
![](http://wmstatic.global.ssl.fastly.net/ml/7140723-f-0d240e57-ea4c-420c-9e4e-249c4396f83e.png?width=206&height=368)
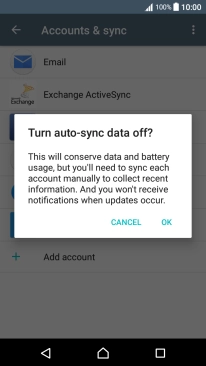
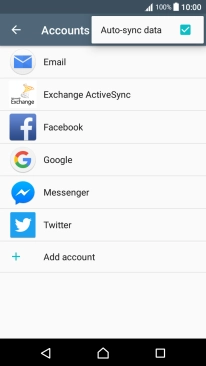
Press Auto-sync data to turn off the function.
![](http://wmstatic.global.ssl.fastly.net/ml/7140723-f-b09ff45f-e264-4794-b54a-29da3b064e27.png?width=206&height=368)
Press OK.
![](http://wmstatic.global.ssl.fastly.net/ml/7140723-f-57d2bac6-3a74-4ba4-8b30-1fad486a0112.png?width=206&height=368)
4. Return to the home screen
Press the Home key to return to the home screen.
![](http://wmstatic.global.ssl.fastly.net/ml/7140723-f-0d240e57-ea4c-420c-9e4e-249c4396f83e.png?width=206&height=368)