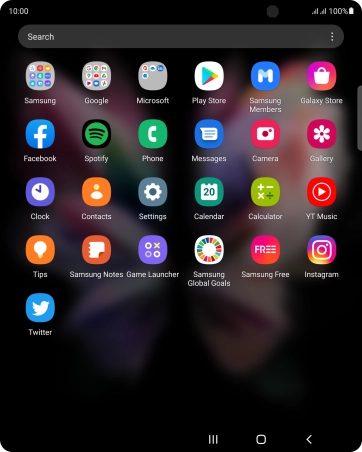
1. Find "Contacts"
Slide your finger upwards on the screen.
![](http://wmstatic.global.ssl.fastly.net/ml/7140723-f-755387b0-a9fd-4591-9b54-e6c035aec1ad.png?width=362&height=454)
Press Contacts.
![](http://wmstatic.global.ssl.fastly.net/ml/7140723-f-92aa78a3-05b9-4faf-ba5b-c6cf1be04704.png?width=362&height=454)
2. Create contact
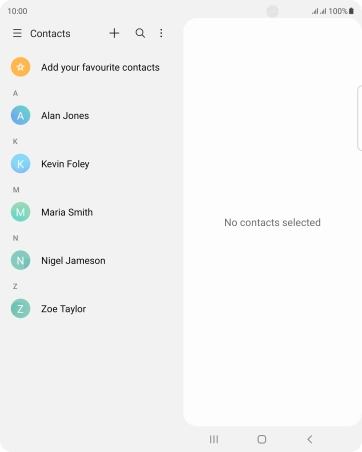
Press the new contact icon.
![](http://wmstatic.global.ssl.fastly.net/ml/7140723-f-f45fc55b-10d7-42f5-9feb-b9876577b448.png?width=362&height=454)
3. Select address book
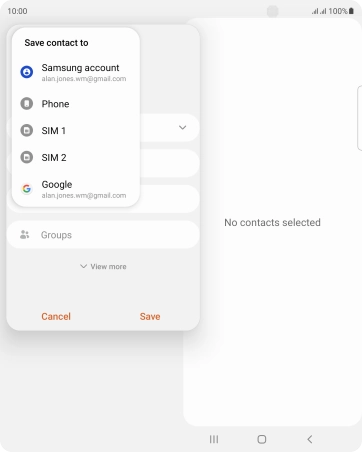
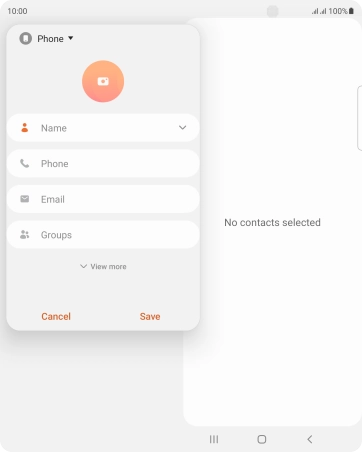
Press the address book drop down list.
![](http://wmstatic.global.ssl.fastly.net/ml/7140723-f-9447daab-711e-4747-b730-066130d76a15.png?width=362&height=454)
Press Phone.
![](http://wmstatic.global.ssl.fastly.net/ml/7140723-f-7c9dcc24-0c43-4439-8077-6bc14e4a82a6.png?width=362&height=454)
4. Enter name
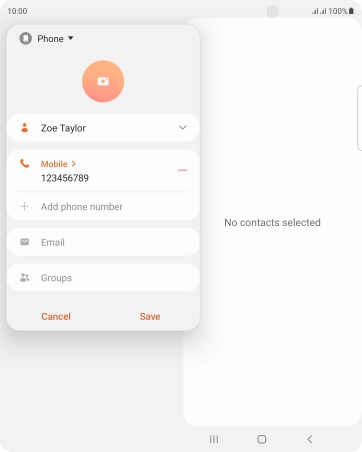
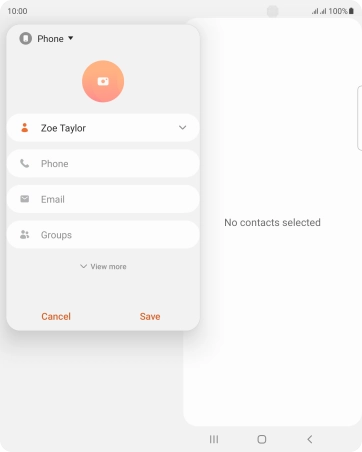
Press Name and key in the required name.
![](http://wmstatic.global.ssl.fastly.net/ml/7140723-f-9447daab-711e-4747-b730-066130d76a15.png?width=362&height=454)
5. Enter phone number
Press Phone and key in the required phone number.
Follow the instructions on the screen to add more information such as an email address and a personal ring tone.
![](http://wmstatic.global.ssl.fastly.net/ml/7140723-f-5e2618b5-66c8-44dc-aced-fa32f2c7b679.png?width=362&height=454)
6. Save contact
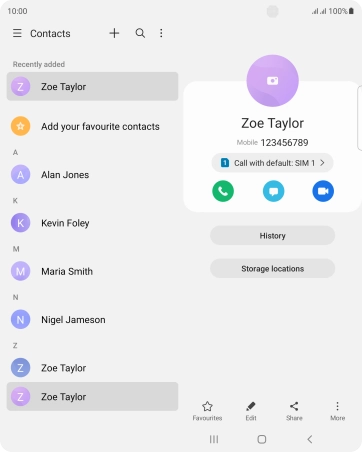
Press Save.
![](http://wmstatic.global.ssl.fastly.net/ml/7140723-f-2074409c-8143-489f-b2c1-b8a6a6893aea.png?width=362&height=454)
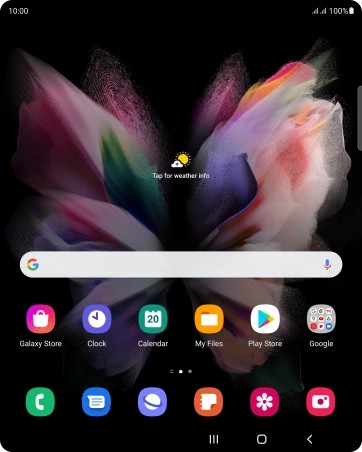
7. Return to the home screen
Press the Home key to return to the home screen.
![](http://wmstatic.global.ssl.fastly.net/ml/7140723-f-72ada697-4f90-4562-9f78-019f23fbe866.png?width=362&height=454)