1. Find "Contacts"
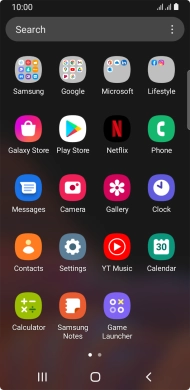
Slide your finger upwards on the screen.
![](http://wmstatic.global.ssl.fastly.net/ml/7140723-f-d0ceff7d-4059-460e-852c-3f907c304854.png?width=190&height=394)
Press Contacts.
![](http://wmstatic.global.ssl.fastly.net/ml/7140723-f-1b574e52-655f-4a2f-ab41-546762aa62c8.png?width=190&height=394)
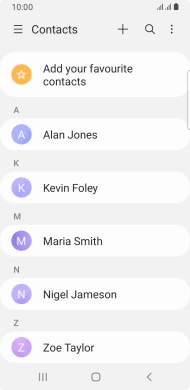
2. Create contact
Press the new contact icon.
![](http://wmstatic.global.ssl.fastly.net/ml/7140723-f-435dc506-6784-4a15-b78a-61d9f3b152b5.png?width=190&height=394)
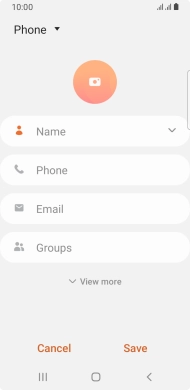
3. Select address book
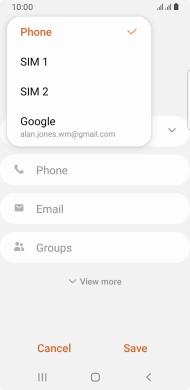
Press the address book drop down list.
![](http://wmstatic.global.ssl.fastly.net/ml/7140723-f-e27829d6-8dbc-4f41-85c7-f2832a956aa3.png?width=190&height=394)
Press Phone.
![](http://wmstatic.global.ssl.fastly.net/ml/7140723-f-26c78cd7-ecbe-4d89-9d68-169a43c16148.png?width=190&height=394)
4. Enter name
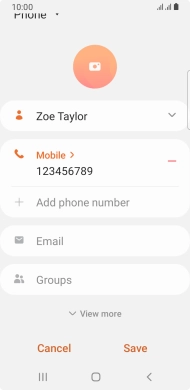
Press Name and key in the required name.
![](http://wmstatic.global.ssl.fastly.net/ml/7140723-f-e27829d6-8dbc-4f41-85c7-f2832a956aa3.png?width=190&height=394)
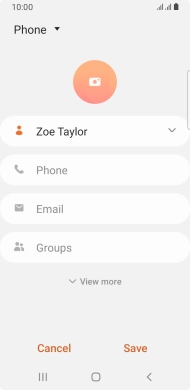
5. Enter phone number
Press Phone and key in the required phone number.
Follow the instructions on the screen to add more information such as an email address and a personal ring tone.
![](http://wmstatic.global.ssl.fastly.net/ml/7140723-f-a858c56c-07a1-4a3c-a786-912e62f9456e.png?width=190&height=394)
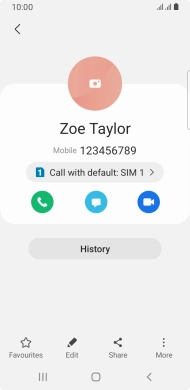
6. Save contact
Press Save.
![](http://wmstatic.global.ssl.fastly.net/ml/7140723-f-4e3cd54f-bf25-4c56-8d62-f8949e3f05f7.png?width=190&height=394)
7. Return to the home screen
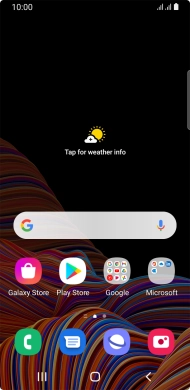
Press the Home key to return to the home screen.
![](http://wmstatic.global.ssl.fastly.net/ml/7140723-f-221dcf88-55bc-4173-9dec-0c2de762d619.png?width=190&height=394)