1. Find "Contacts"
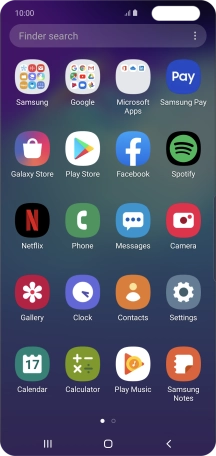
Slide your finger upwards on the screen.
![](http://wmstatic.global.ssl.fastly.net/ml/7140723-f-13aa9a5f-a943-4dd2-bbc7-adf99288ee19.png?width=216&height=456)
Press Contacts.
![](http://wmstatic.global.ssl.fastly.net/ml/7140723-f-d6ae7f68-4df5-497e-834c-8791d4848898.png?width=216&height=456)
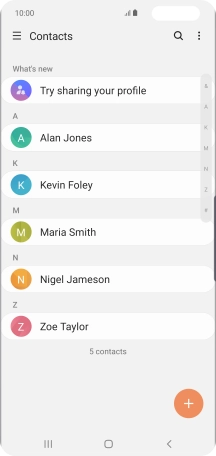
2. Create contact
Press the new contact icon.
![](http://wmstatic.global.ssl.fastly.net/ml/7140723-f-93637c2b-0018-4e59-861d-ed65c578667b.png?width=216&height=456)
3. Select address book
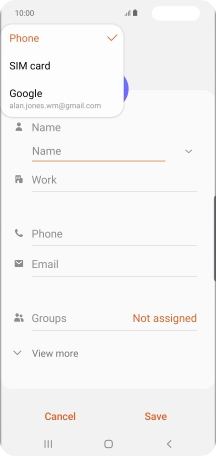
Press the address book drop down list.
![](http://wmstatic.global.ssl.fastly.net/ml/7140723-f-8f5047cc-a364-477b-a759-e9883d553869.png?width=216&height=456)
Press Phone.
![](http://wmstatic.global.ssl.fastly.net/ml/7140723-f-06d841ba-e24d-46af-b29b-24e17abda7a7.png?width=216&height=456)
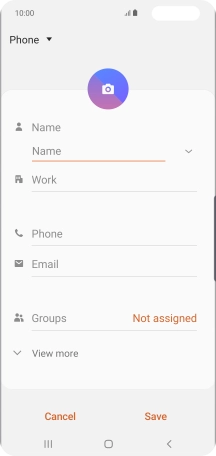
4. Enter name
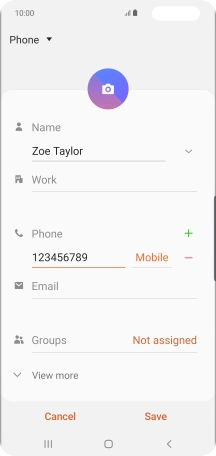
Press the field below "Name" and key in the required name.
![](http://wmstatic.global.ssl.fastly.net/ml/7140723-f-8f5047cc-a364-477b-a759-e9883d553869.png?width=216&height=456)
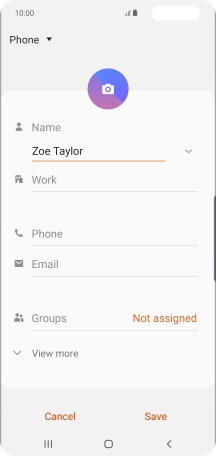
5. Enter phone number
Press Phone and key in the required phone number.
Follow the instructions on the screen to add more information such as an email address and a personal ring tone.
![](http://wmstatic.global.ssl.fastly.net/ml/7140723-f-e972050b-3234-4940-b0d4-f957e0a5aa8b.png?width=216&height=456)
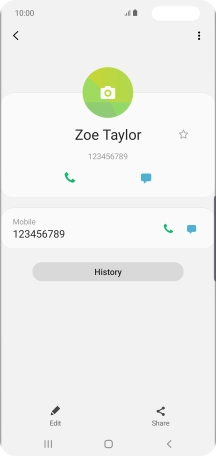
6. Save contact
Press Save.
![](http://wmstatic.global.ssl.fastly.net/ml/7140723-f-8c230cd1-fcc8-48c7-8da1-a4264d3f4f61.png?width=216&height=456)
7. Return to the home screen
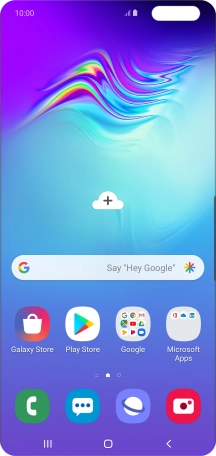
Press the Home key to return to the home screen.
![](http://wmstatic.global.ssl.fastly.net/ml/7140723-f-82ab73aa-a543-4664-927b-cbc4757bd7d6.png?width=216&height=456)