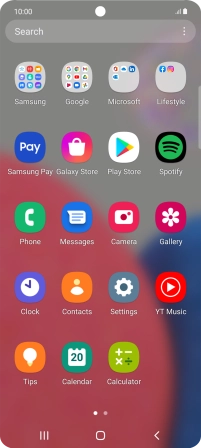
1. Find "Contacts"
Slide your finger upwards on the screen.
![](http://wmstatic.global.ssl.fastly.net/ml/7140723-f-53e8964b-4547-49a1-ae0f-a67705569200.png?width=202&height=448)
Press Contacts.
![](http://wmstatic.global.ssl.fastly.net/ml/7140723-f-9f8e5c63-91bc-47bf-9a71-54a88ace8285.png?width=202&height=448)
2. Create contact
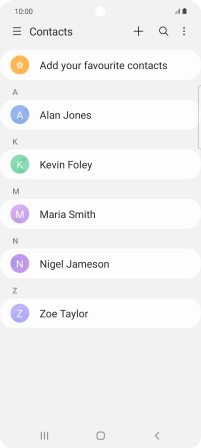
Press the new contact icon.
![](http://wmstatic.global.ssl.fastly.net/ml/7140723-f-47de1ee8-e219-4b0e-bbc7-c9afa953d6cc.png?width=202&height=448)
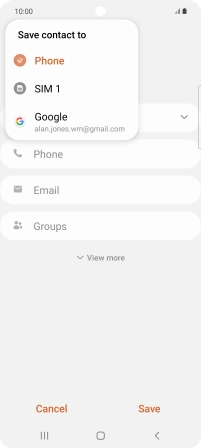
3. Select address book
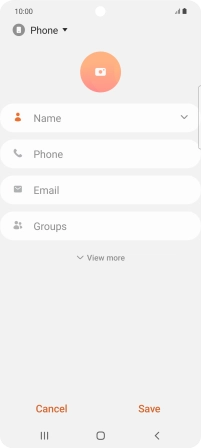
Press the address book drop down list.
![](http://wmstatic.global.ssl.fastly.net/ml/7140723-f-789d82cd-ddb4-4778-9f46-7c37d0bf9ca4.png?width=202&height=448)
Press Phone.
![](http://wmstatic.global.ssl.fastly.net/ml/7140723-f-77035862-baeb-4bc8-86c3-0ecf87297ebc.png?width=202&height=448)
4. Enter name
Press Name and key in the required name.
![](http://wmstatic.global.ssl.fastly.net/ml/7140723-f-789d82cd-ddb4-4778-9f46-7c37d0bf9ca4.png?width=202&height=448)
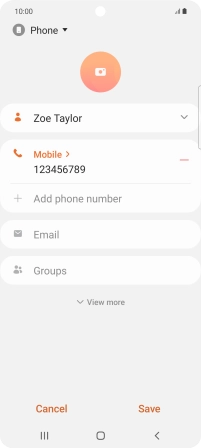
5. Enter phone number
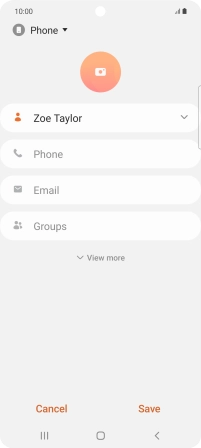
Press Phone and key in the required phone number.
Follow the instructions on the screen to add more information such as an email address and a personal ring tone.
![](http://wmstatic.global.ssl.fastly.net/ml/7140723-f-9e89386b-0a41-46bf-a67d-b1d61685774b.png?width=202&height=448)
6. Save contact
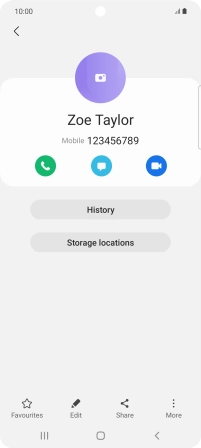
Press Save.
![](http://wmstatic.global.ssl.fastly.net/ml/7140723-f-f8d8ee1c-aab1-4119-abb7-dafa649935b8.png?width=202&height=448)
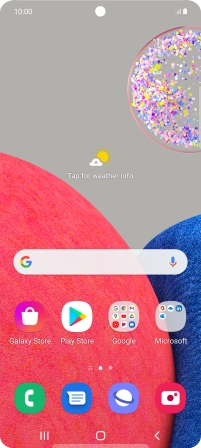
7. Return to the home screen
Press the Home key to return to the home screen.
![](http://wmstatic.global.ssl.fastly.net/ml/7140723-f-e148b53d-d8df-4045-948c-de1b7724d461.png?width=202&height=448)