1 Find "Access point name"
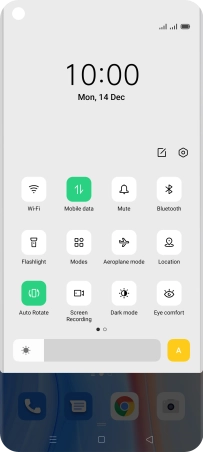
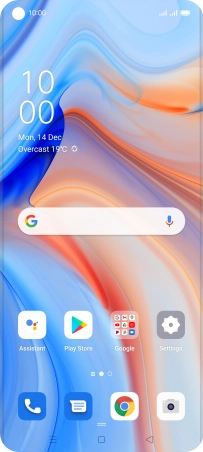
Slide two fingers downwards starting from the top of the screen.
![](http://wmstatic.global.ssl.fastly.net/ml/7140723-f-dcb3cc6d-4af6-4520-afef-1cf345ae8870.png?width=204&height=452)
Press the settings icon.
![](http://wmstatic.global.ssl.fastly.net/ml/7140723-f-ce341a3d-e91b-433c-aeb7-6e304666366d.png?width=204&height=452)
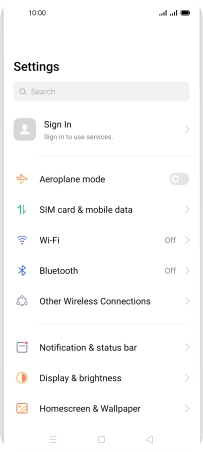
Press SIM card & mobile data.
![](http://wmstatic.global.ssl.fastly.net/ml/7140723-f-20990c7f-0f77-4aec-b2da-2b90fe7a3f30.png?width=204&height=452)
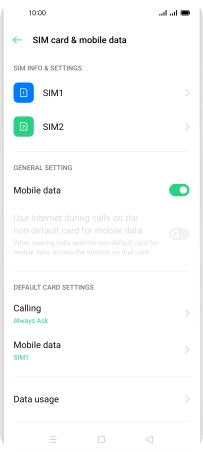
Press the required SIM.
![](http://wmstatic.global.ssl.fastly.net/ml/7140723-f-9fd222a4-b718-4d4d-86e5-9541369deeaa.png?width=204&height=452)
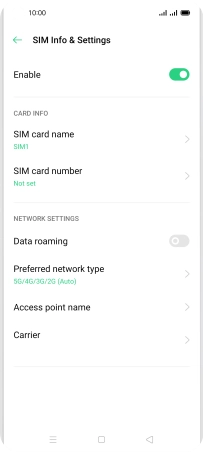
Press Access point name.
![](http://wmstatic.global.ssl.fastly.net/ml/7140723-f-2a05cfcf-09ee-40b1-9fb3-7727eecc6e8e.png?width=204&height=452)
2 Create new data connection
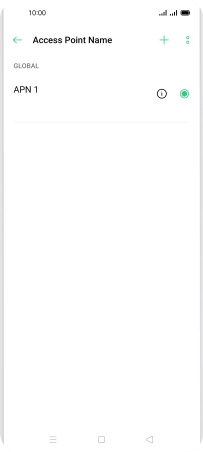
Press the add icon.
![](http://wmstatic.global.ssl.fastly.net/ml/7140723-f-c2a6df63-0d7c-4944-8b04-1eb45c61807f.png?width=204&height=452)
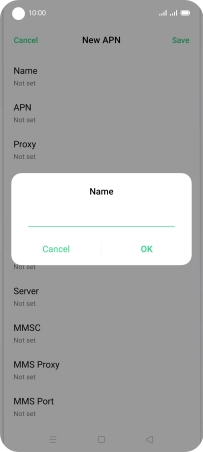
Press Name.
![](http://wmstatic.global.ssl.fastly.net/ml/7140723-f-035fabc6-c1a0-42e0-80fd-2a299fa10c07.png?width=204&height=452)
Key in Vodafone Internet and press OK.
![](http://wmstatic.global.ssl.fastly.net/ml/7140723-f-304cdc8a-e8d5-4b5a-b213-e8563b4fdfd1.png?width=204&height=452)
Vodafone Internet
3 Enter APN
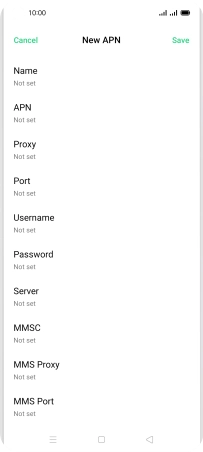
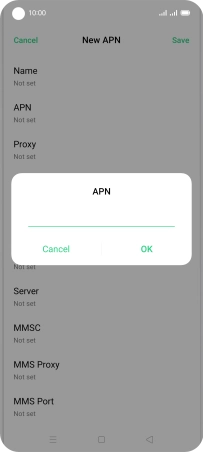
Press APN.
![](http://wmstatic.global.ssl.fastly.net/ml/7140723-f-035fabc6-c1a0-42e0-80fd-2a299fa10c07.png?width=204&height=452)
Key in live.vodafone.com and press OK.
![](http://wmstatic.global.ssl.fastly.net/ml/7140723-f-209d77d2-3b50-4488-b996-1b5e827bffe9.png?width=204&height=452)
live.vodafone.com
4 Enter country code
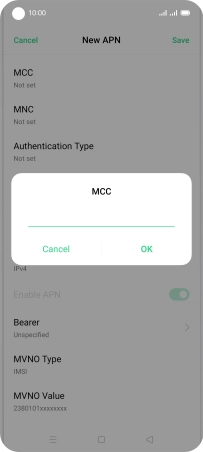
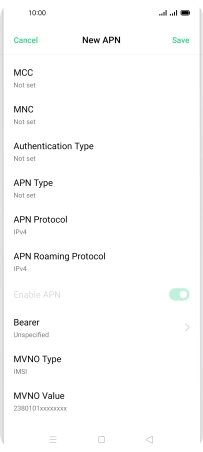
Press MCC.
![](http://wmstatic.global.ssl.fastly.net/ml/7140723-f-bf6af7ec-142c-48ac-b6a5-1b469304fa83.png?width=204&height=452)
Key in 272 and press OK.
![](http://wmstatic.global.ssl.fastly.net/ml/7140723-f-6227a966-371c-48f5-8098-8d521b7dfadc.png?width=204&height=452)
272
5 Enter network code
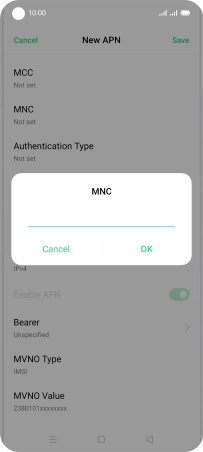
Press MNC.
![](http://wmstatic.global.ssl.fastly.net/ml/7140723-f-bf6af7ec-142c-48ac-b6a5-1b469304fa83.png?width=204&height=452)
Key in 01 and press OK.
![](http://wmstatic.global.ssl.fastly.net/ml/7140723-f-be8fe0cd-e1f7-417d-adcd-707f80e2a14b.png?width=204&height=452)
01
6 Select authentication type
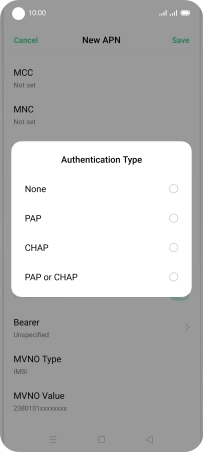
Press Authentication Type.
![](http://wmstatic.global.ssl.fastly.net/ml/7140723-f-bf6af7ec-142c-48ac-b6a5-1b469304fa83.png?width=204&height=452)
Press PAP.
![](http://wmstatic.global.ssl.fastly.net/ml/7140723-f-145c4d26-736d-42f0-9d59-c2328e82dbd3.png?width=204&height=452)
7 Enter APN type
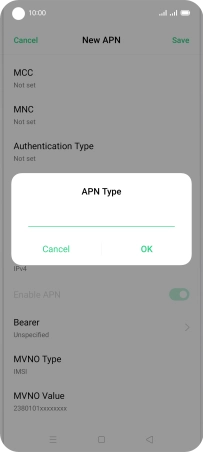
Press APN Type.
![](http://wmstatic.global.ssl.fastly.net/ml/7140723-f-bf6af7ec-142c-48ac-b6a5-1b469304fa83.png?width=204&height=452)
Key in default and press OK.
![](http://wmstatic.global.ssl.fastly.net/ml/7140723-f-6dc61849-b60a-4fe2-8085-8e1b3a416b7c.png?width=204&height=452)
default
8 Save data connection
Press Save.
![](http://wmstatic.global.ssl.fastly.net/ml/7140723-f-bf6af7ec-142c-48ac-b6a5-1b469304fa83.png?width=204&height=452)
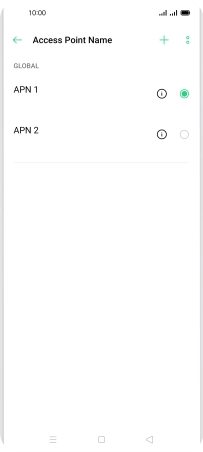
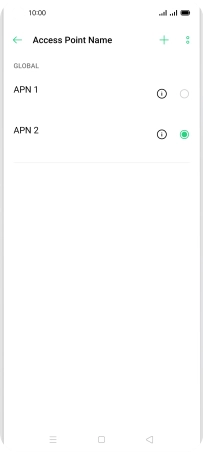
Press the field next to the data connection to activate it.
![](http://wmstatic.global.ssl.fastly.net/ml/7140723-f-b39ab516-4f8d-4f8a-87ea-7ac6fbd44b84.png?width=204&height=452)
9 Return to the home screen
Press the Home key to return to the home screen.
![](http://wmstatic.global.ssl.fastly.net/ml/7140723-f-a6e06967-26b1-4857-aca8-4ccb82ff44c5.png?width=204&height=452)