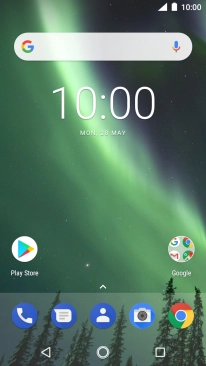
1. Open the address book
Press the contacts icon.
![](http://wmstatic.global.ssl.fastly.net/ml/7140723-f-dfed505a-0f13-42b2-a92b-ffbb1186e200.png?width=206&height=368)
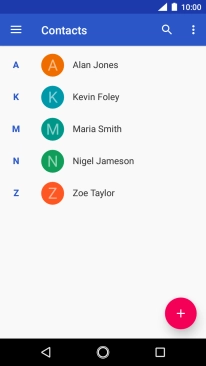
2. Create contact
Press the new contact icon.
![](http://wmstatic.global.ssl.fastly.net/ml/7140723-f-71882b67-7e87-4f8f-a941-8b15320bb509.png?width=206&height=368)
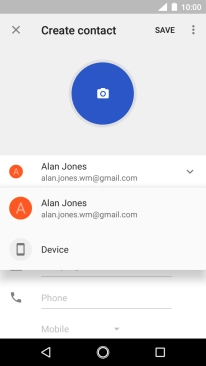
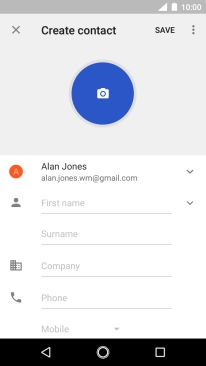
3. Select address book
Press the address book drop down list.
![](http://wmstatic.global.ssl.fastly.net/ml/7140723-f-cbe377ca-3efc-4f3d-a5c9-bb2acfb8d7a7.png?width=206&height=368)
Press Device.
![](http://wmstatic.global.ssl.fastly.net/ml/7140723-f-14496b8c-9ed7-4104-a4aa-f4bc61469417.png?width=206&height=368)
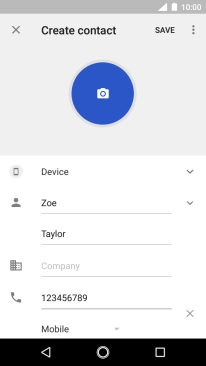
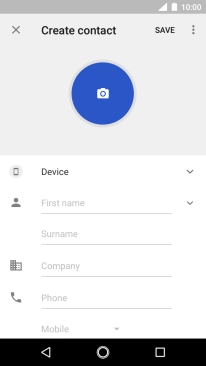
4. Enter first name
Press First name and key in the required first name.
![](http://wmstatic.global.ssl.fastly.net/ml/7140723-f-f951598b-a3f6-49a7-9261-bf28f011f09c.png?width=206&height=368)
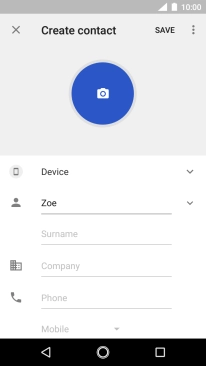
5. Enter last name
Press Surname and key in the required last name.
![](http://wmstatic.global.ssl.fastly.net/ml/7140723-f-35198b99-9be8-427c-b9c6-3c5f7a958fbc.png?width=206&height=368)
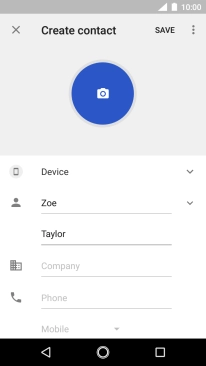
6. Enter phone number
Press Phone and key in the required phone number.
Follow the instructions on the screen to add more information such as an email address and a personal ring tone.
![](http://wmstatic.global.ssl.fastly.net/ml/7140723-f-1cf87bf1-4a86-43b3-8430-4aa18a0fc13c.png?width=206&height=368)
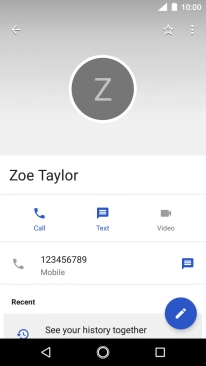
7. Save contact
Press SAVE.
![](http://wmstatic.global.ssl.fastly.net/ml/7140723-f-2b9a6d42-8dc0-49d4-b028-094dd39bceca.png?width=206&height=368)
8. Return to the home screen
Press the Home key to return to the home screen.
![](http://wmstatic.global.ssl.fastly.net/ml/7140723-f-e692d3b6-0469-4cb7-bf38-f7dd90ba7421.png?width=206&height=368)