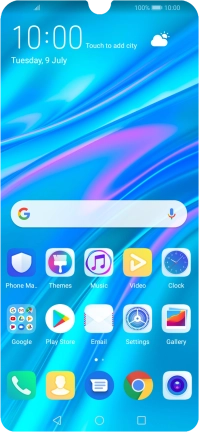
1. Open the address book
Press the contacts icon.
![](http://wmstatic.global.ssl.fastly.net/ml/7140723-f-575a1223-a6b7-48ab-9a4b-21189040fd4a.png?width=200&height=432)
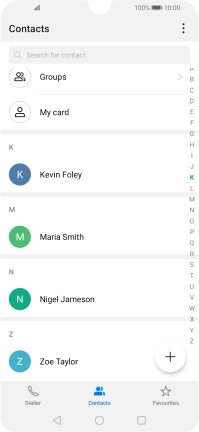
2. Create contact
Press the new contact icon.
![](http://wmstatic.global.ssl.fastly.net/ml/7140723-f-33bc0cff-2770-4efe-a561-bc0d2b62368b.png?width=200&height=432)
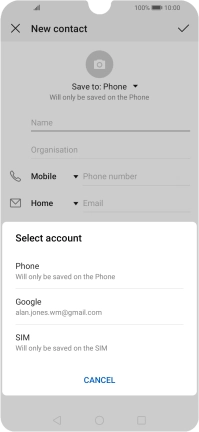
3. Select address book
Press the address book drop down list.
![](http://wmstatic.global.ssl.fastly.net/ml/7140723-f-55b4fa96-2a45-42db-aa6c-27e7631a062c.png?width=200&height=432)
Press Phone.
![](http://wmstatic.global.ssl.fastly.net/ml/7140723-f-a423c7c1-f88b-4458-9212-5483f4b04ff0.png?width=200&height=432)
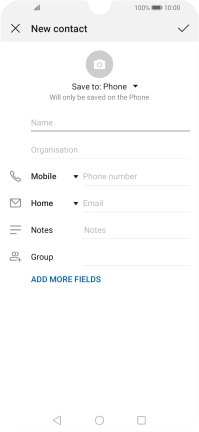
4. Enter name
Press Name.
![](http://wmstatic.global.ssl.fastly.net/ml/7140723-f-55b4fa96-2a45-42db-aa6c-27e7631a062c.png?width=200&height=432)
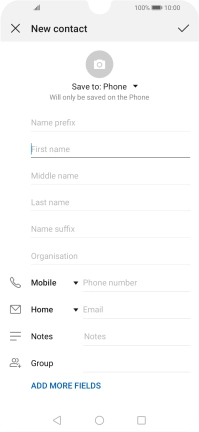
Press First name and key in the first name.
![](http://wmstatic.global.ssl.fastly.net/ml/7140723-f-2f26a06b-e4d9-44d7-9aa0-e7434c7ce908.png?width=200&height=432)
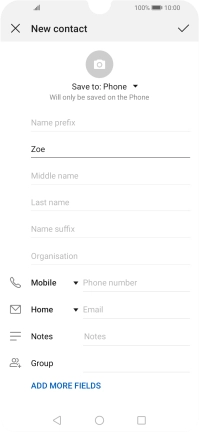
Press Last name and key in the last name.
![](http://wmstatic.global.ssl.fastly.net/ml/7140723-f-e2508330-cf91-423c-8478-6fae99c3646e.png?width=200&height=432)
5. Enter phone number
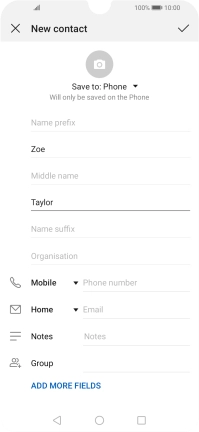
Press Phone number and key in the required phone number.
Follow the instructions on the screen to add more information such as an email address and a personal ring tone.
![](http://wmstatic.global.ssl.fastly.net/ml/7140723-f-90b63866-2a76-4e30-a7e7-3eff2cf0454d.png?width=200&height=432)
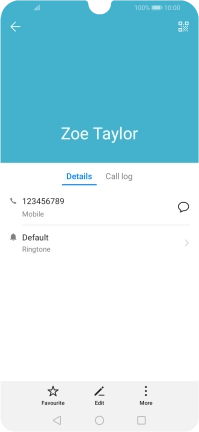
6. Save contact
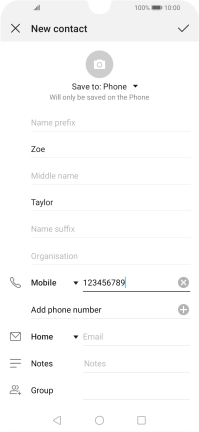
Press the confirm icon.
![](http://wmstatic.global.ssl.fastly.net/ml/7140723-f-cca46fbd-7a7c-4b31-bb24-052a3dabae1f.png?width=200&height=432)
7. Return to the home screen
Press the Home key to return to the home screen.
![](http://wmstatic.global.ssl.fastly.net/ml/7140723-f-103f5e0d-f909-4d35-becd-972eb737a466.png?width=200&height=432)