1. Open the address book
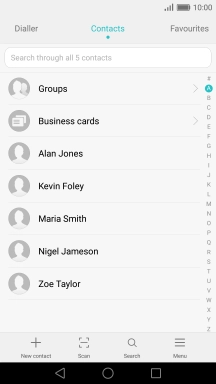
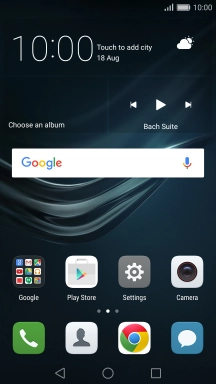
Press the contacts icon.
![](http://wmstatic.global.ssl.fastly.net/ml/7140723-f-f4836bf5-2b39-403b-9fb1-23c6a6e4a69c.png?width=216&height=384)
2. Create contact
Press New contact.
![](http://wmstatic.global.ssl.fastly.net/ml/7140723-f-25620e8b-8d66-4415-9e53-2a1b941ee589.png?width=216&height=384)
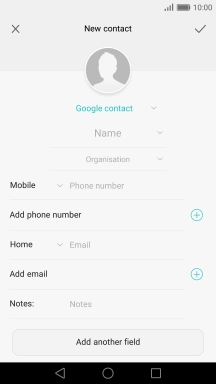
3. Add picture
Press the picture icon.
![](http://wmstatic.global.ssl.fastly.net/ml/7140723-f-9db98269-a015-487c-8c5e-1d08eaef72c2.png?width=216&height=384)
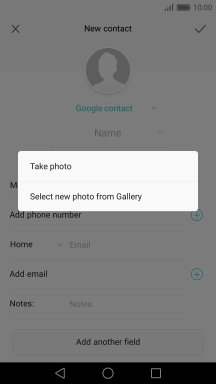
Press Select new photo from Gallery and go to the required folder.
![](http://wmstatic.global.ssl.fastly.net/ml/7140723-f-40506642-9d0f-44f2-8848-ae3f5ebe2d3c.png?width=216&height=384)
Press the required picture.
![](http://wmstatic.global.ssl.fastly.net/ml/7140723-f-d2de70c8-8c8f-4981-9e36-135b830377de.png?width=216&height=384)
Drag the frame to the required position to select the required detail and press the confirm icon.
![](http://wmstatic.global.ssl.fastly.net/ml/7140723-f-2faca9bb-c1fe-414a-bfc8-2984fa6c0b68.png?width=216&height=384)
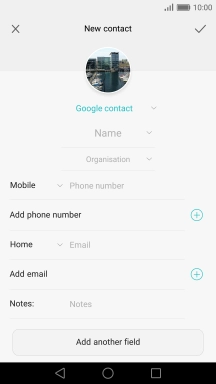
4. Select address book
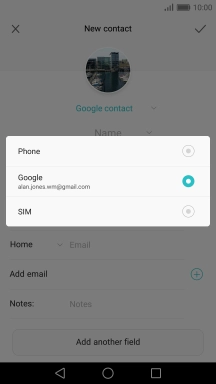
Press the address book drop down list.
![](http://wmstatic.global.ssl.fastly.net/ml/7140723-f-88ffad83-f8fa-4a6f-a3f1-05701ae2ec18.png?width=216&height=384)
Press Phone.
![](http://wmstatic.global.ssl.fastly.net/ml/7140723-f-890ad93b-f096-4684-a6a1-f9df0ef4d666.png?width=216&height=384)
5. Enter name
Press Name and key in the name.
![](http://wmstatic.global.ssl.fastly.net/ml/7140723-f-88ffad83-f8fa-4a6f-a3f1-05701ae2ec18.png?width=216&height=384)
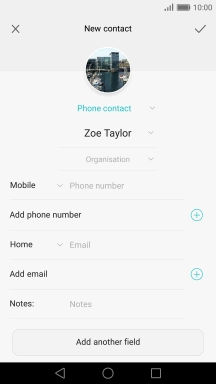
6. Enter phone number
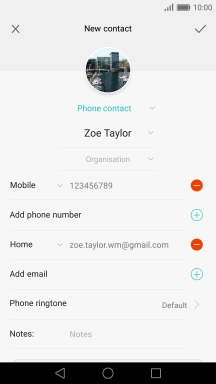
Press Phone number and key in the required phone number.
![](http://wmstatic.global.ssl.fastly.net/ml/7140723-f-a8dbf400-bf06-494b-8be7-f83519490e5a.png?width=216&height=384)
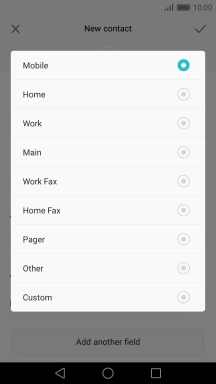
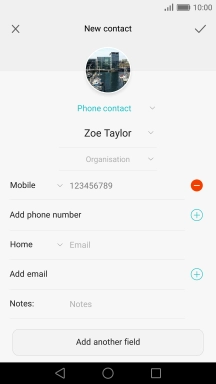
Press the drop down list next to the phone number.
![](http://wmstatic.global.ssl.fastly.net/ml/7140723-f-08f1b4e2-4899-436a-ad98-ff67986b1f07.png?width=216&height=384)
Press the required number type.
![](http://wmstatic.global.ssl.fastly.net/ml/7140723-f-124d0e6e-d80c-40f3-a776-f6b48f824f71.png?width=216&height=384)
7. Enter email address
Press Email and key in the required email address.
![](http://wmstatic.global.ssl.fastly.net/ml/7140723-f-08f1b4e2-4899-436a-ad98-ff67986b1f07.png?width=216&height=384)
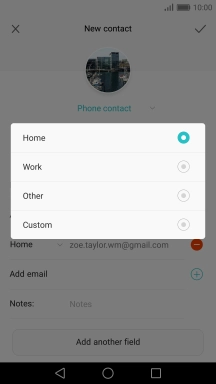
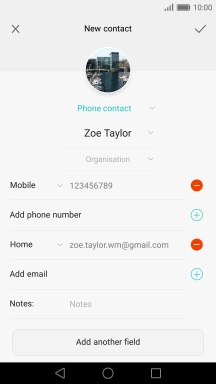
Press the drop down list next to the email address.
![](http://wmstatic.global.ssl.fastly.net/ml/7140723-f-bc953431-1319-477d-87d5-a796fc29f0ed.png?width=216&height=384)
Press the required email type.
![](http://wmstatic.global.ssl.fastly.net/ml/7140723-f-65436571-6ed7-4922-b0b2-4d108affed8b.png?width=216&height=384)
8. Assign a ring tone
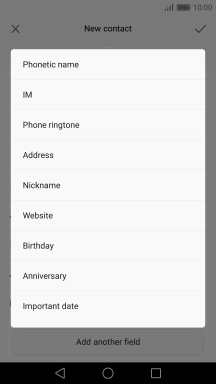
Press Add another field.
![](http://wmstatic.global.ssl.fastly.net/ml/7140723-f-bc953431-1319-477d-87d5-a796fc29f0ed.png?width=216&height=384)
Press Phone ringtone.
![](http://wmstatic.global.ssl.fastly.net/ml/7140723-f-e0693a84-10ad-4cdf-9773-4695ff4f126a.png?width=216&height=384)
Press Phone ringtone.
![](http://wmstatic.global.ssl.fastly.net/ml/7140723-f-0967d5ff-5708-4922-b6a3-cd1d69ff8bfb.png?width=216&height=384)
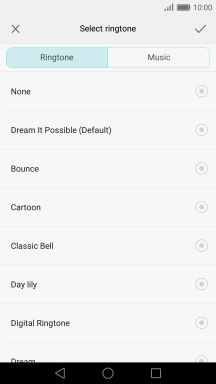
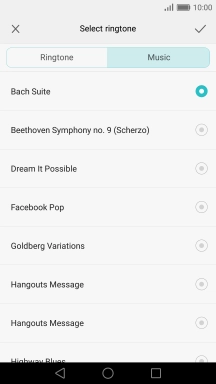
Press Music.
![](http://wmstatic.global.ssl.fastly.net/ml/7140723-f-1fc3dd15-3d7f-481d-8b98-39912f96a7c8.png?width=216&height=384)
Press the required ring tones to hear them.
![](http://wmstatic.global.ssl.fastly.net/ml/7140723-f-bd58112e-48f6-420d-8e98-dd1f0ab25286.png?width=216&height=384)
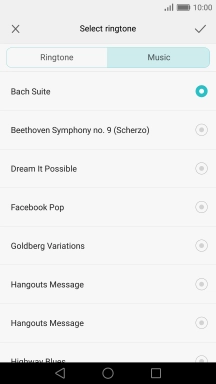
Once you've found a ring tone you like, press the confirm icon.
![](http://wmstatic.global.ssl.fastly.net/ml/7140723-f-4ad2410b-c2e2-40c9-8475-230f29fda01c.png?width=216&height=384)
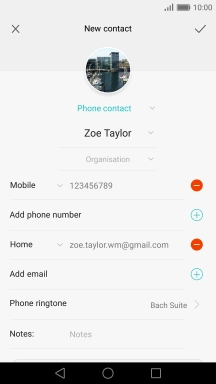
9. Save contact
Press the confirm icon.
![](http://wmstatic.global.ssl.fastly.net/ml/7140723-f-ecdec25e-7f13-4d69-b24d-9d0ecffac431.png?width=216&height=384)
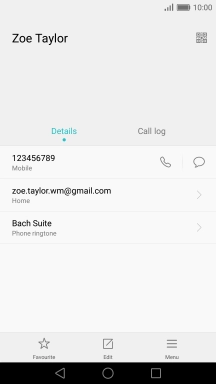
10. Return to the home screen
Press the Home key to return to the home screen.
![](http://wmstatic.global.ssl.fastly.net/ml/7140723-f-6d3e2853-483a-4a27-837e-1e5224e783b0.png?width=216&height=384)