1 Find "Access Point Names"
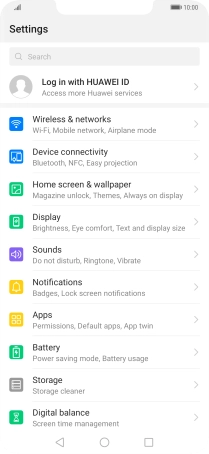
Press Settings.
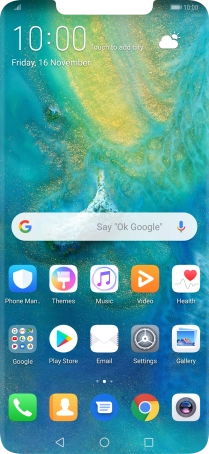
![](http://wmstatic.global.ssl.fastly.net/ml/7140723-f-cd0b1fd4-ea35-48c2-8042-7d9b39da840c.png?width=210&height=454)
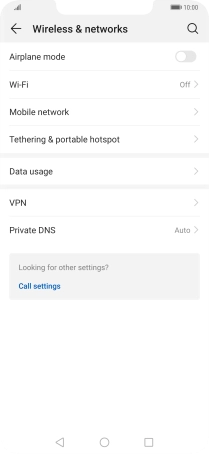
Press Wireless & networks.
![](http://wmstatic.global.ssl.fastly.net/ml/7140723-f-8839e96f-9b49-4840-a40c-7d0b3bcd11ff.png?width=210&height=454)
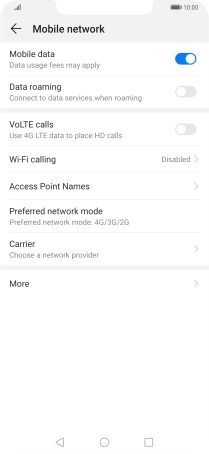
Press Mobile network.
![](http://wmstatic.global.ssl.fastly.net/ml/7140723-f-0c2d445f-b754-4424-8e0c-c84964bfa9ba.png?width=210&height=454)
Press Access Point Names.
![](http://wmstatic.global.ssl.fastly.net/ml/7140723-f-eac84ce8-7d30-47d1-99f7-8d1cac729f66.png?width=210&height=454)
2 Create new data connection
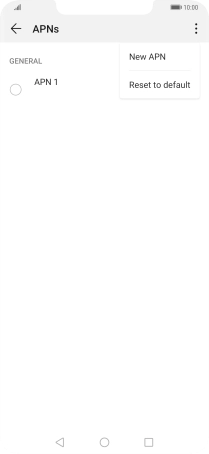
Press the menu icon.
![](http://wmstatic.global.ssl.fastly.net/ml/7140723-f-b3a098c6-33db-440b-91a9-f6d18dc102ff.png?width=210&height=454)
Press New APN.
![](http://wmstatic.global.ssl.fastly.net/ml/7140723-f-5ddbfd0e-806f-4a0e-ab60-f5471572b824.png?width=210&height=454)
3 Enter a name for the connection
Press Name.
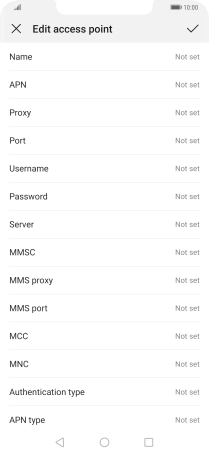
![](http://wmstatic.global.ssl.fastly.net/ml/7140723-f-6e45541b-58d5-4e5c-9628-8b9c3ed91e75.png?width=210&height=454)
Key in Vodafone Internet and press OK.
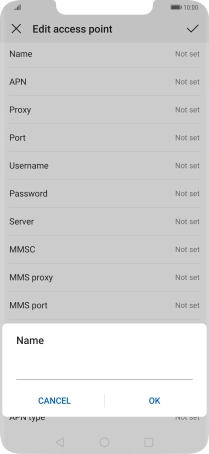
![](http://wmstatic.global.ssl.fastly.net/ml/7140723-f-57da0d45-735d-41ab-9569-98436636977b.png?width=210&height=454)
Vodafone Internet
4 Enter APN
Press APN.
![](http://wmstatic.global.ssl.fastly.net/ml/7140723-f-6e45541b-58d5-4e5c-9628-8b9c3ed91e75.png?width=210&height=454)
Key in live.vodafone.com and press OK.
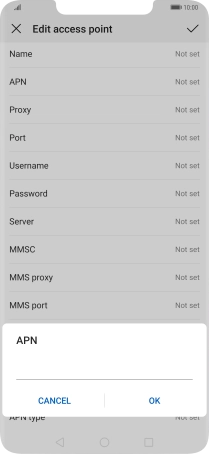
![](http://wmstatic.global.ssl.fastly.net/ml/7140723-f-7b7a38b0-0505-4549-972f-7c17470269d6.png?width=210&height=454)
live.vodafone.com
5 Enter country code
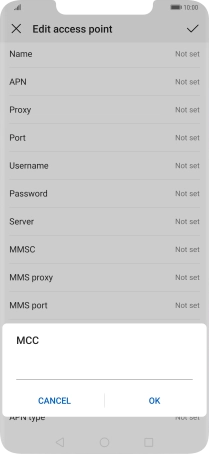
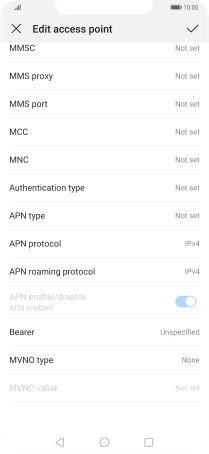
Press MCC.
![](http://wmstatic.global.ssl.fastly.net/ml/7140723-f-a9e24a18-ca73-4e00-a492-df29bdd592c3.png?width=210&height=454)
Key in 272 and press OK.
![](http://wmstatic.global.ssl.fastly.net/ml/7140723-f-b8b74a60-b03b-40b6-9e96-97e6c5f67d06.png?width=210&height=454)
272
6 Enter network code
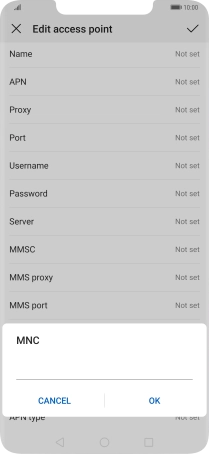
Press MNC.
![](http://wmstatic.global.ssl.fastly.net/ml/7140723-f-a9e24a18-ca73-4e00-a492-df29bdd592c3.png?width=210&height=454)
Key in 01 and press OK.
![](http://wmstatic.global.ssl.fastly.net/ml/7140723-f-03965b6c-4285-40ae-89ae-81b08fd35229.png?width=210&height=454)
01
7 Select authentication type
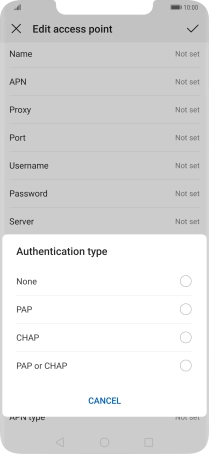
Press Authentication type.
![](http://wmstatic.global.ssl.fastly.net/ml/7140723-f-a9e24a18-ca73-4e00-a492-df29bdd592c3.png?width=210&height=454)
Press PAP.
![](http://wmstatic.global.ssl.fastly.net/ml/7140723-f-1b2c85ca-00e6-43e6-933d-8ab84fecd9cb.png?width=210&height=454)
8 Enter APN type
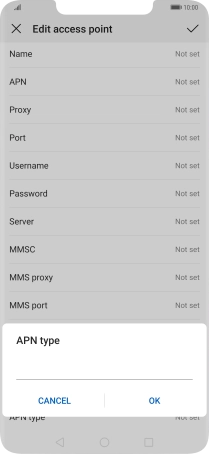
Press APN type.
![](http://wmstatic.global.ssl.fastly.net/ml/7140723-f-a9e24a18-ca73-4e00-a492-df29bdd592c3.png?width=210&height=454)
Key in default and press OK.
![](http://wmstatic.global.ssl.fastly.net/ml/7140723-f-6b1e2f1c-93b3-4f2c-a60a-006c91ad3e20.png?width=210&height=454)
default
9 Save data connection
Press the confirm icon.
![](http://wmstatic.global.ssl.fastly.net/ml/7140723-f-a9e24a18-ca73-4e00-a492-df29bdd592c3.png?width=210&height=454)
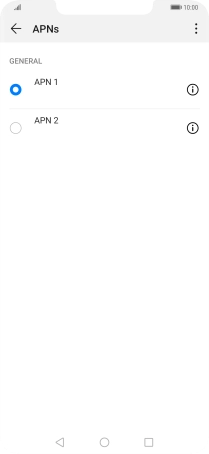
Press the field next to the required data connection to activate it.
![](http://wmstatic.global.ssl.fastly.net/ml/7140723-f-007d14b9-d1c4-409a-baae-99dcdd550a40.png?width=210&height=454)
10 Return to the home screen
Press the Home key to return to the home screen.
![](http://wmstatic.global.ssl.fastly.net/ml/7140723-f-ce60ca55-a1d2-42d1-bf51-82152b0ea589.png?width=210&height=454)