Help and Support for
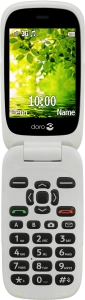
Doro 6520
Proprietary OS
Choose a help topic
Set up your Doro 6520 Proprietary OS for picture messaging
A picture message is a message which can contain pictures and other media files and can be sent to other mobile phones. You can send and receive picture messages as soon as you've inserted your SIM. If this isn't the case, you can set up your phone for picture messaging manually.