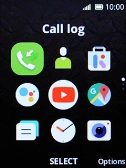
1. Create contact
Press the Navigation key.
![](http://wmstatic.global.ssl.fastly.net/ml/7140723-f-3c85e59f-3eac-4eb6-993d-64046c2b2d63.png?width=126&height=170)
Select the address book icon.
![](http://wmstatic.global.ssl.fastly.net/ml/7140723-f-67deb7f2-03e9-4aa3-bc8c-70eee4e945e2.png?width=126&height=170)
Highlight any contact.
![](http://wmstatic.global.ssl.fastly.net/ml/7140723-f-732dd6eb-a411-45a1-ae18-a6f6ad2756f1.png?width=126&height=170)
Press the Left selection key.
![](http://wmstatic.global.ssl.fastly.net/ml/7140723-f-732dd6eb-a411-45a1-ae18-a6f6ad2756f1.png?width=126&height=170)
2. Select address book
Select Phone memory.
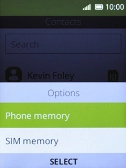
![](http://wmstatic.global.ssl.fastly.net/ml/7140723-f-bc104fe0-496d-4ef1-bd88-65c65a22650e.png?width=126&height=170)
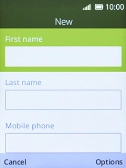
3. Enter first name
Highlight First name and key in the required first name.
![](http://wmstatic.global.ssl.fastly.net/ml/7140723-f-841513d5-f245-4c9f-a2b3-f2e91d81f83e.png?width=126&height=170)
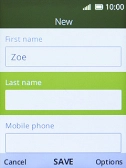
4. Enter last name
Highlight Last name and key in the required last name.
![](http://wmstatic.global.ssl.fastly.net/ml/7140723-f-bf8ae670-b688-49c2-8297-4540fcfe5046.png?width=126&height=170)
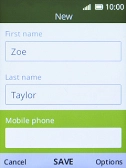
5. Enter phone number
Highlight Mobile phone and key in the required phone number.
Follow the instructions on the screen to add more information such as an email address and a personal ring tone.
![](http://wmstatic.global.ssl.fastly.net/ml/7140723-f-97a5a490-1199-4b84-8cac-cdea5c9e5684.png?width=126&height=170)
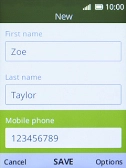
6. Save contact
Press the Navigation key.
![](http://wmstatic.global.ssl.fastly.net/ml/7140723-f-be6eb644-ed86-4f7e-afa8-3b56639c15b8.png?width=126&height=170)
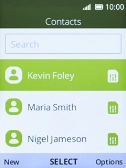
7. Return to the home screen
Press Disconnect several times to return to the home screen.
![](http://wmstatic.global.ssl.fastly.net/ml/7140723-f-f8d1d72f-5932-4ef9-8916-7daab00a88ea.png?width=126&height=170)