1. Find "iCloud Backup"
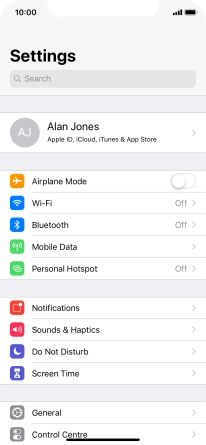
Press Settings.
![](http://wmstatic.global.ssl.fastly.net/ml/7140723-f-e7935005-f350-495c-a1eb-bad38fee529e.png?width=206&height=448)
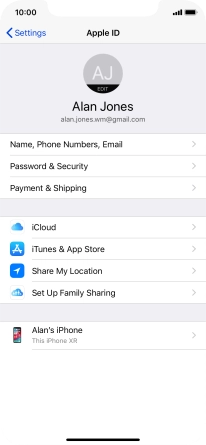
Press your Apple ID.
![](http://wmstatic.global.ssl.fastly.net/ml/7140723-f-26864221-6ffd-4128-9e5e-220fe0bdaea9.png?width=206&height=448)
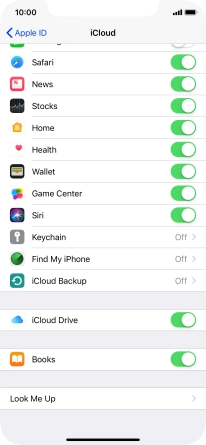
Press iCloud.
![](http://wmstatic.global.ssl.fastly.net/ml/7140723-f-ec06e977-1bb6-4a66-ab37-94ddfaae337a.png?width=206&height=448)
Press iCloud Backup.
![](http://wmstatic.global.ssl.fastly.net/ml/7140723-f-9d2b0968-57fa-4bcb-b7be-78ff2da852fc.png?width=206&height=448)
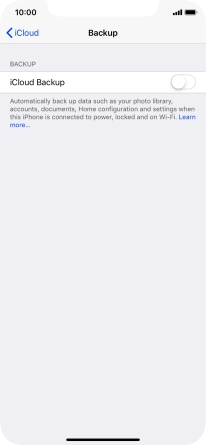
2. Turn on automatic iCloud backup
Press the indicator next to "iCloud Backup" to turn on the function.
![](http://wmstatic.global.ssl.fastly.net/ml/7140723-f-ca6581c2-1a3e-4f46-8757-b087a1e78659.png?width=206&height=448)
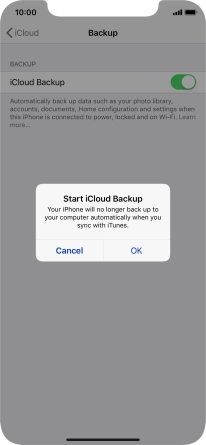
Press OK.
The phone memory will be backed up automatically when your phone is charging, the screen lock is turned on and a Wi-Fi connection is established.
![](http://wmstatic.global.ssl.fastly.net/ml/7140723-f-4c46885a-608f-464b-a0ff-873b9003170c.png?width=206&height=448)
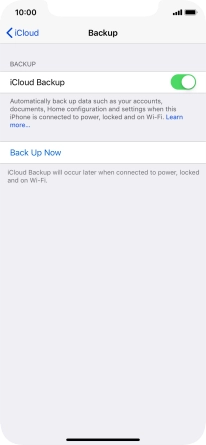
3. Back up phone memory to iCloud
Press Back Up Now and wait while the phone memory is backed up.
![](http://wmstatic.global.ssl.fastly.net/ml/7140723-f-f6c98c3d-fe67-4c57-ace3-e134e6ab8231.png?width=206&height=448)
4. Return to the home screen
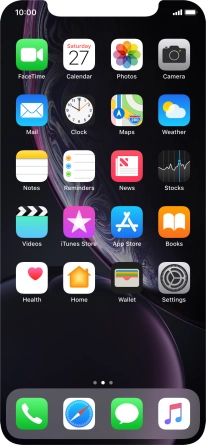
Slide your finger upwards starting from the bottom of the screen to return to the home screen.
![](http://wmstatic.global.ssl.fastly.net/ml/7140723-f-f6c98c3d-fe67-4c57-ace3-e134e6ab8231.png?width=206&height=448)