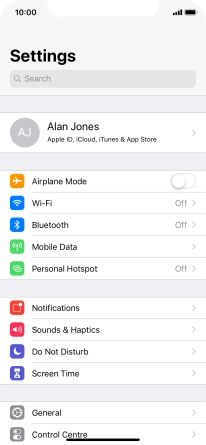
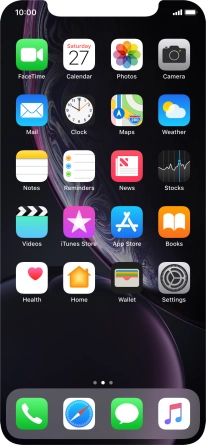
1. Find "Screen Time"
Press Settings.
![](http://wmstatic.global.ssl.fastly.net/ml/7140723-f-e7935005-f350-495c-a1eb-bad38fee529e.png?width=206&height=448)
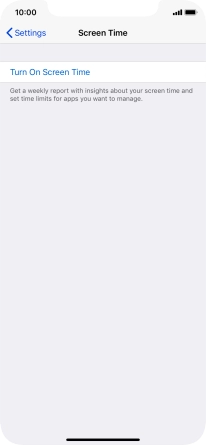
Press Screen Time.
![](http://wmstatic.global.ssl.fastly.net/ml/7140723-f-26864221-6ffd-4128-9e5e-220fe0bdaea9.png?width=206&height=448)
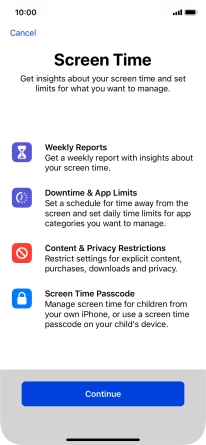
2. Turn on Screen Time
Press Turn On Screen Time.
![](http://wmstatic.global.ssl.fastly.net/ml/7140723-f-904dae15-7080-4898-bf6f-80f3a1f98dec.png?width=206&height=448)
Press Continue.
![](http://wmstatic.global.ssl.fastly.net/ml/7140723-f-234bfd1a-6345-4c26-ab1d-e50bbae97e1c.png?width=206&height=448)
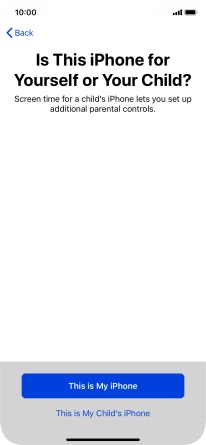
Press This is My iPhone.
![](http://wmstatic.global.ssl.fastly.net/ml/7140723-f-9f437bd8-61d9-4992-a4a1-4a80fddad5c5.png?width=206&height=448)
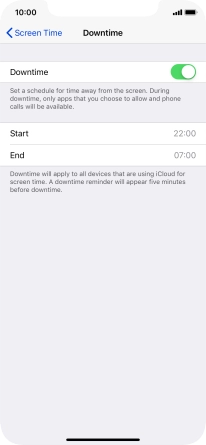
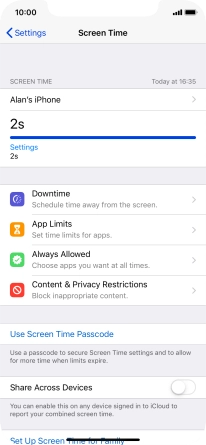
3. Select Downtime settings
Press Downtime.
![](http://wmstatic.global.ssl.fastly.net/ml/7140723-f-9cf6bb1b-3832-47d6-93b6-82f3419d97c9.png?width=206&height=448)
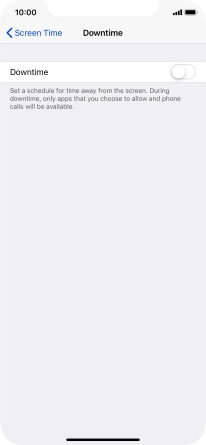
Press the indicator next to "Downtime" and follow the instructions on the screen to select Downtime period.
During Downtime only calls and allowed apps will be available.
![](http://wmstatic.global.ssl.fastly.net/ml/7140723-f-87f7e1c8-7fa2-42ca-8e92-a12ad427c8a2.png?width=206&height=448)
Press arrow left.
![](http://wmstatic.global.ssl.fastly.net/ml/7140723-f-699fe3c4-7256-46ef-82b0-21e5ad5fde26.png?width=206&height=448)
4. Select time limits for app usage
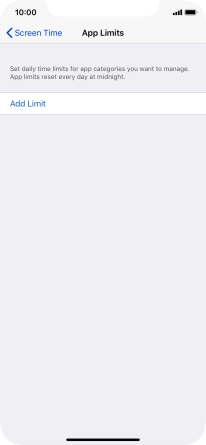
Press App Limits.
![](http://wmstatic.global.ssl.fastly.net/ml/7140723-f-9cf6bb1b-3832-47d6-93b6-82f3419d97c9.png?width=206&height=448)
Press Add Limit.
![](http://wmstatic.global.ssl.fastly.net/ml/7140723-f-bc991b2b-0fe0-4740-8aab-00bf28517e84.png?width=206&height=448)
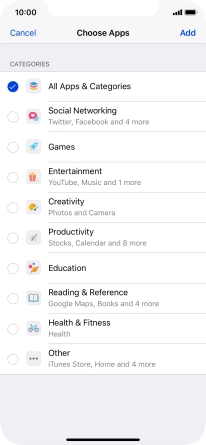
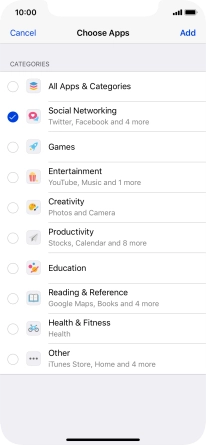
Press the required categories.
![](http://wmstatic.global.ssl.fastly.net/ml/7140723-f-1f4beeba-e510-4571-b3f8-5d46439d66b5.png?width=206&height=448)
Press Add.
![](http://wmstatic.global.ssl.fastly.net/ml/7140723-f-b189099d-9d67-4d1d-b385-465c945571a8.png?width=206&height=448)
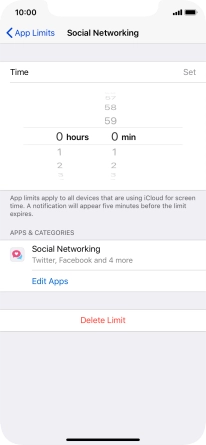
Set the required time limit for use of the selected category.
![](http://wmstatic.global.ssl.fastly.net/ml/7140723-f-8697923f-bf2a-4042-aa15-4e8ba0eb5561.png?width=206&height=448)
5. Select days for time limits of app usage
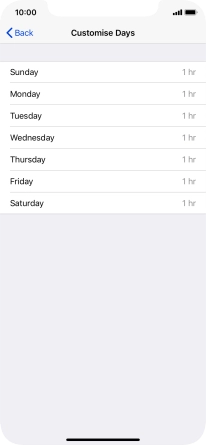
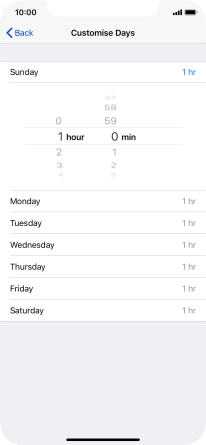
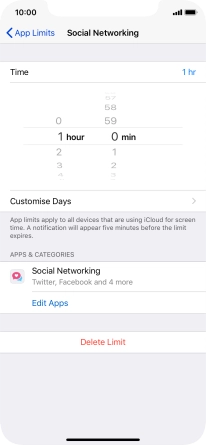
Press Customise Days.
![](http://wmstatic.global.ssl.fastly.net/ml/7140723-f-15fd22e6-ce5e-4c57-8b7b-e31e7710f28a.png?width=206&height=448)
Press the required days.
![](http://wmstatic.global.ssl.fastly.net/ml/7140723-f-e8e8df1c-65de-474f-96cf-2dccde6b52d6.png?width=206&height=448)
Select the required period.
![](http://wmstatic.global.ssl.fastly.net/ml/7140723-f-d089dfc2-a7a9-4c6b-9dde-ee7ad0379ba0.png?width=206&height=448)
Press arrow left.
![](http://wmstatic.global.ssl.fastly.net/ml/7140723-f-d089dfc2-a7a9-4c6b-9dde-ee7ad0379ba0.png?width=206&height=448)
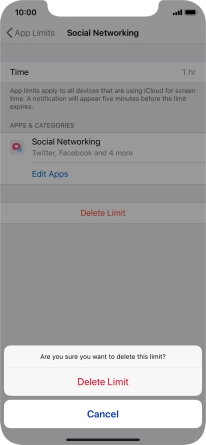
6. Delete time limits for app usage
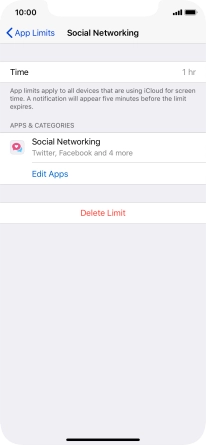
Press Delete Limit.
![](http://wmstatic.global.ssl.fastly.net/ml/7140723-f-ec3b307e-b0d8-4a5d-98ca-425f105160d6.png?width=206&height=448)
Press Delete Limit.
![](http://wmstatic.global.ssl.fastly.net/ml/7140723-f-57e546de-ccc1-43ad-a40c-1381a44dd0ce.png?width=206&height=448)
Press arrow left.
![](http://wmstatic.global.ssl.fastly.net/ml/7140723-f-bc991b2b-0fe0-4740-8aab-00bf28517e84.png?width=206&height=448)
7. Select apps that can be used during Downtime
Press Always Allowed.
![](http://wmstatic.global.ssl.fastly.net/ml/7140723-f-9cf6bb1b-3832-47d6-93b6-82f3419d97c9.png?width=206&height=448)
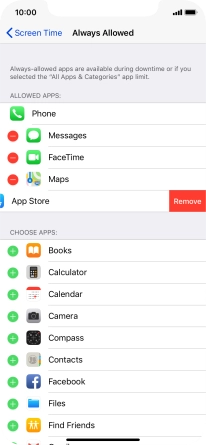
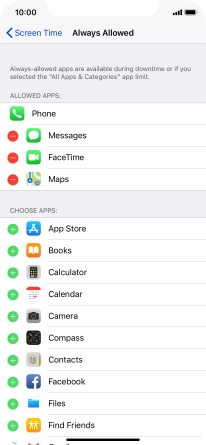
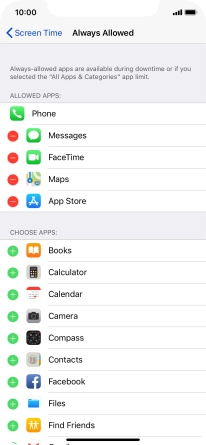
Press the add icon next to the required app to add it to the list of allowed apps during Downtime.
![](http://wmstatic.global.ssl.fastly.net/ml/7140723-f-5cdefc02-089e-4407-a8ce-7926840cb1f8.png?width=206&height=448)
Press the remove icon next to the required app to remove it from the list of allowed apps during Downtime.
![](http://wmstatic.global.ssl.fastly.net/ml/7140723-f-74ef5966-e977-4eae-a18c-19bfd4c0572b.png?width=206&height=448)
Press Remove.
![](http://wmstatic.global.ssl.fastly.net/ml/7140723-f-a3e58edf-92f2-4c30-acd0-141ef87a67ed.png?width=206&height=448)
Press arrow left.
![](http://wmstatic.global.ssl.fastly.net/ml/7140723-f-5cdefc02-089e-4407-a8ce-7926840cb1f8.png?width=206&height=448)
8. Select settings for content and restrictions
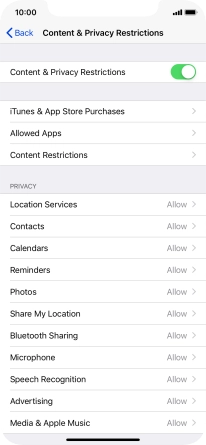
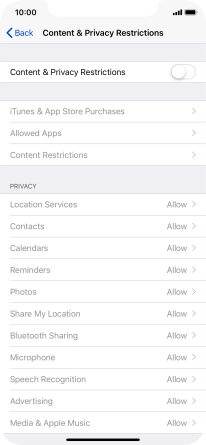
Press Content & Privacy Restrictions.
![](http://wmstatic.global.ssl.fastly.net/ml/7140723-f-9cf6bb1b-3832-47d6-93b6-82f3419d97c9.png?width=206&height=448)
Press the indicator next to "Content & Privacy Restrictions" and follow the instructions on the screen to select settings for content and privacy restrictions.
![](http://wmstatic.global.ssl.fastly.net/ml/7140723-f-2bf7d855-39bb-46de-a401-1f20e5191e75.png?width=206&height=448)
Press arrow left.
![](http://wmstatic.global.ssl.fastly.net/ml/7140723-f-0ddb83f6-f528-4197-bd56-e668a0a799e2.png?width=206&height=448)
9. Turn on use of password
Press Use Screen Time Passcode and follow the instructions on the screen to select a Screen Time password.
If you turn on the function, you need to key in the password to access Screen Time settings.
![](http://wmstatic.global.ssl.fastly.net/ml/7140723-f-9cf6bb1b-3832-47d6-93b6-82f3419d97c9.png?width=206&height=448)
10. Return to the home screen
Slide your finger upwards starting from the bottom of the screen to return to the home screen.
![](http://wmstatic.global.ssl.fastly.net/ml/7140723-f-9cf6bb1b-3832-47d6-93b6-82f3419d97c9.png?width=206&height=448)