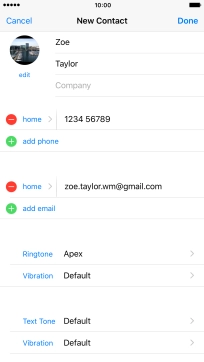
1. Create contact
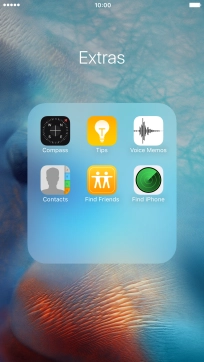
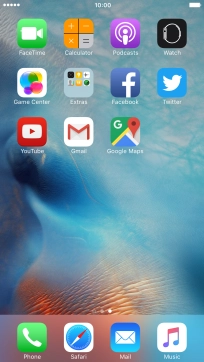
Press Extras.
![](http://wmstatic.global.ssl.fastly.net/ml/7140723-f-820cf5ed-b18b-41f6-9097-ae59bd1c3c81.png?width=204&height=366)
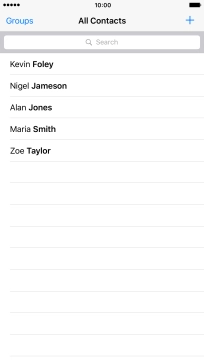
Press Contacts.
![](http://wmstatic.global.ssl.fastly.net/ml/7140723-f-db8720ca-5301-45c5-ae30-c230e81ef8ed.png?width=204&height=366)
Press the new contact icon.
![](http://wmstatic.global.ssl.fastly.net/ml/7140723-f-c349741f-29f3-4e97-a060-eac8475f996c.png?width=204&height=366)
2. Enter name
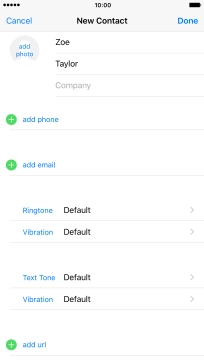
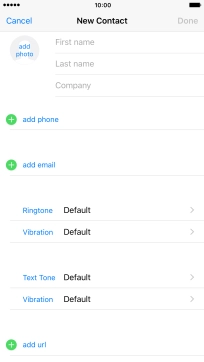
Press First name and key in the first name.
![](http://wmstatic.global.ssl.fastly.net/ml/7140723-f-99709452-6943-4d23-8706-29e032d2aa6d.png?width=204&height=366)
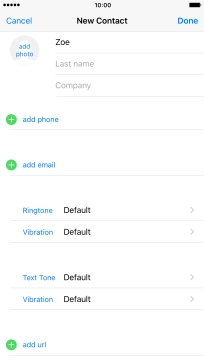
Press Last name and key in the last name.
![](http://wmstatic.global.ssl.fastly.net/ml/7140723-f-fdca0529-25e2-4910-844a-0f4cc1ef0208.png?width=204&height=366)
3. Add picture
Press add photo.
![](http://wmstatic.global.ssl.fastly.net/ml/7140723-f-5ac6e585-60c8-4b54-8a03-b63657d7e8cd.png?width=204&height=366)
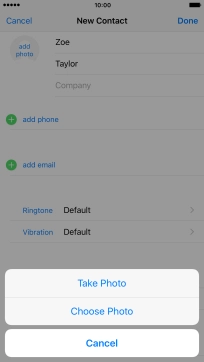
Press Choose Photo and go to the required folder.
![](http://wmstatic.global.ssl.fastly.net/ml/7140723-f-f60a3778-a681-4d32-aa9b-12af4a5317b8.png?width=204&height=366)
Press the required picture.
![](http://wmstatic.global.ssl.fastly.net/ml/7140723-f-aa8d1cf0-c923-41ac-a24b-ceda0266289f.png?width=204&height=366)
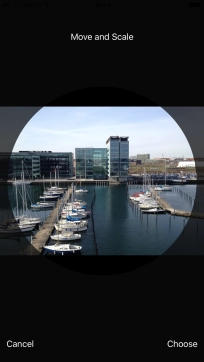
Drag the frame to the required position to select the required detail and press Choose.
![](http://wmstatic.global.ssl.fastly.net/ml/7140723-f-6a8f554a-5749-4a81-8c5c-8a3b81057895.png?width=204&height=366)
4. Enter phone number
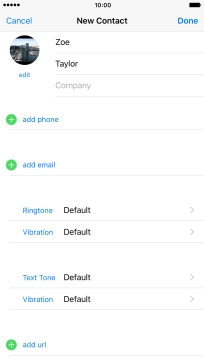
Press add phone and key in the required phone number.
![](http://wmstatic.global.ssl.fastly.net/ml/7140723-f-8343c05a-58a0-4fb6-82fd-a4808d837105.png?width=204&height=366)
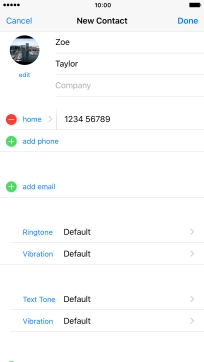
5. Select number type
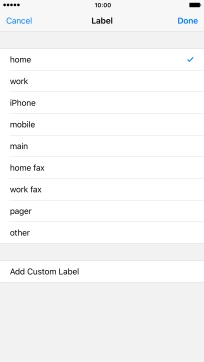
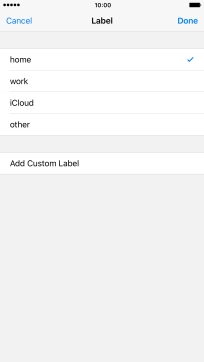
Press the field next to the phone number.
![](http://wmstatic.global.ssl.fastly.net/ml/7140723-f-41495132-7ea9-42e3-8f1d-651046b64bc0.png?width=204&height=366)
Press the required number type.
![](http://wmstatic.global.ssl.fastly.net/ml/7140723-f-d4fabecf-7d24-43f9-8c88-fabb06777e56.png?width=204&height=366)
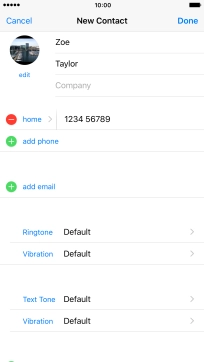
6. Enter email address
Press add email and key in the required email address.
![](http://wmstatic.global.ssl.fastly.net/ml/7140723-f-35bd235c-8c1d-4cc9-b92a-fc89419d5343.png?width=204&height=366)
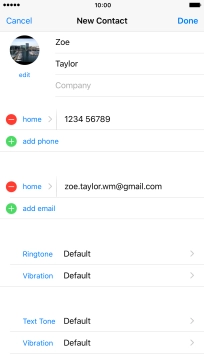
7. Select email type
Press the field next to the email address.
![](http://wmstatic.global.ssl.fastly.net/ml/7140723-f-2f87f4b8-365c-406b-90c3-c29e8fb980d2.png?width=204&height=366)
Press the required email type.
![](http://wmstatic.global.ssl.fastly.net/ml/7140723-f-07b71faf-d715-454f-8147-a535b5c4db32.png?width=204&height=366)
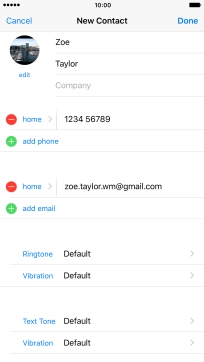
8. Add personal ring tone
Press Ringtone.
![](http://wmstatic.global.ssl.fastly.net/ml/7140723-f-0a72fc28-ee74-4f85-82ab-f6eabe0b18fc.png?width=204&height=366)
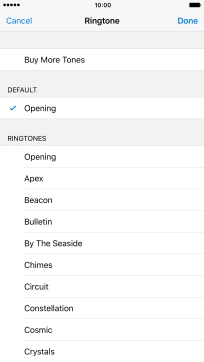
Press the required ring tones to hear them.
![](http://wmstatic.global.ssl.fastly.net/ml/7140723-f-4f556b3f-86aa-46b5-8d43-db25fc098ef0.png?width=204&height=366)
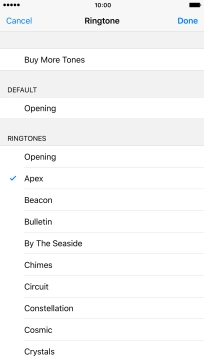
Once you've found a ring tone you like, press Done.
![](http://wmstatic.global.ssl.fastly.net/ml/7140723-f-7f3713dc-3f27-4cdd-8670-331fd5b1e254.png?width=204&height=366)
9. Save contact
Press Done.
![](http://wmstatic.global.ssl.fastly.net/ml/7140723-f-db91fed6-929d-42eb-88d4-97185d3f315d.png?width=204&height=366)
10. Return to the home screen
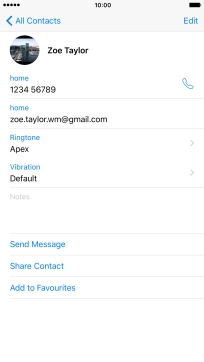
Press the Home key to return to the home screen.
![](http://wmstatic.global.ssl.fastly.net/ml/7140723-f-3f1b9e2f-e1a0-475d-9a2c-d8f4777b442b.png?width=204&height=366)