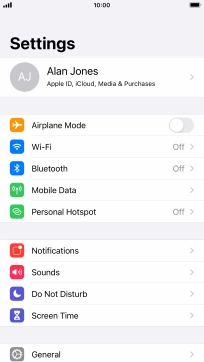
1. Find "Screen Time"
Press Settings.
![](http://wmstatic.global.ssl.fastly.net/ml/7140723-f-77386f20-4611-473e-a41a-f1e43616d220.png?width=204&height=366)
Press Screen Time.
![](http://wmstatic.global.ssl.fastly.net/ml/7140723-f-b65541f7-465b-41ae-8945-b33122a17be0.png?width=204&height=366)
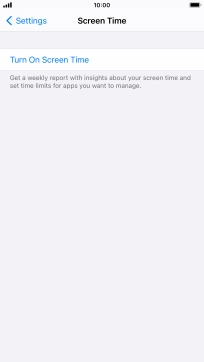
2. Turn on Screen Time
Press Turn On Screen Time.
![](http://wmstatic.global.ssl.fastly.net/ml/7140723-f-6015f249-b64c-4066-abd2-4a78df81d13d.png?width=204&height=366)
Press Continue.
![](http://wmstatic.global.ssl.fastly.net/ml/7140723-f-400e23ec-105f-4fa7-bb4f-51969646785f.png?width=204&height=366)
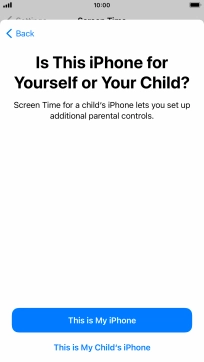
Press This is My iPhone.
![](http://wmstatic.global.ssl.fastly.net/ml/7140723-f-e3a37f92-c321-46bf-a9a4-3b73f04c8fc8.png?width=204&height=366)
3. Select Downtime settings
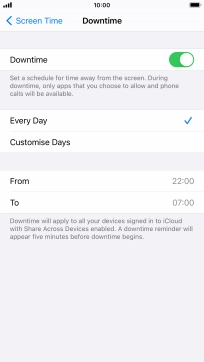
Press Downtime.
![](http://wmstatic.global.ssl.fastly.net/ml/7140723-f-ab94af69-fb7b-42ce-a7df-5df337dbf454.png?width=204&height=366)
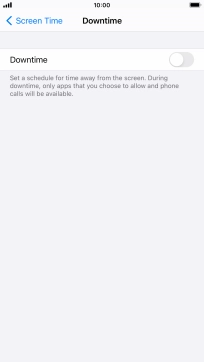
Press the indicator next to "Downtime" and follow the instructions on the screen to select Downtime period.
During Downtime only calls and allowed apps will be available.
![](http://wmstatic.global.ssl.fastly.net/ml/7140723-f-c16565ca-6bba-4f03-ad30-770b9fde9902.png?width=204&height=366)
Press arrow left.
![](http://wmstatic.global.ssl.fastly.net/ml/7140723-f-f91b1ce1-bdde-4ef7-984d-98c801d94b5c.png?width=204&height=366)
4. Select time limits for app usage
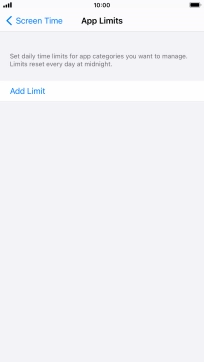
Press App Limits.
![](http://wmstatic.global.ssl.fastly.net/ml/7140723-f-ab94af69-fb7b-42ce-a7df-5df337dbf454.png?width=204&height=366)
Press Add Limit.
![](http://wmstatic.global.ssl.fastly.net/ml/7140723-f-1238627c-92cb-43f3-9190-5278cd21e9b9.png?width=204&height=366)
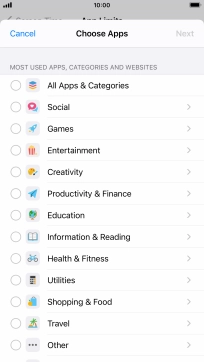
Press the required categories.
![](http://wmstatic.global.ssl.fastly.net/ml/7140723-f-40f6c8ac-caed-48fd-bb9a-ebb0665050d9.png?width=204&height=366)
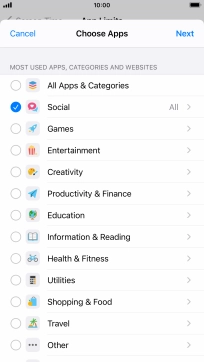
Press Next.
![](http://wmstatic.global.ssl.fastly.net/ml/7140723-f-dc335b28-c2d4-41c5-a7b0-afa82342c499.png?width=204&height=366)
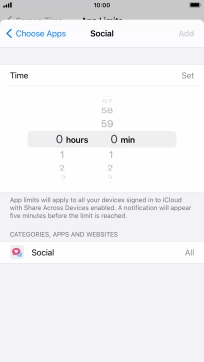
Set the required time limit for use of the selected category.
![](http://wmstatic.global.ssl.fastly.net/ml/7140723-f-079d1b6b-def6-4f2c-9df9-bdc1dfda2f93.png?width=204&height=366)
5. Select days for time limits of app usage
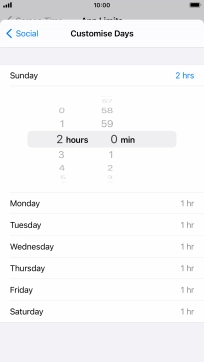
Press Customise Days.
![](http://wmstatic.global.ssl.fastly.net/ml/7140723-f-6080d5ac-1de9-4ecd-bbe7-f21427f42c00.png?width=204&height=366)
Press the required days.
![](http://wmstatic.global.ssl.fastly.net/ml/7140723-f-3707b021-5cd2-4df9-893c-7d3637697bf5.png?width=204&height=366)
Select the required time limit.
![](http://wmstatic.global.ssl.fastly.net/ml/7140723-f-d3dfb38c-1b99-45be-989c-c40f3eb69537.png?width=204&height=366)
Press arrow left.
![](http://wmstatic.global.ssl.fastly.net/ml/7140723-f-d3dfb38c-1b99-45be-989c-c40f3eb69537.png?width=204&height=366)
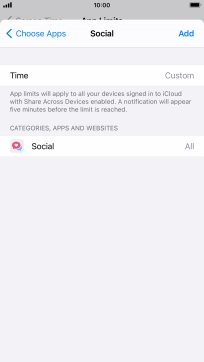
Press Add.
![](http://wmstatic.global.ssl.fastly.net/ml/7140723-f-06c3cee6-480b-45c4-bbfd-e709339b1934.png?width=204&height=366)
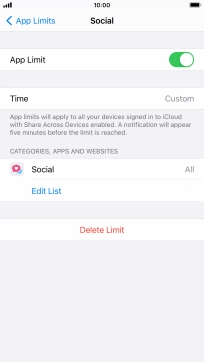
6. Delete time limits for app usage
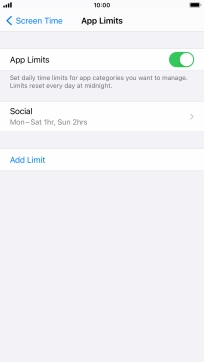
Press the required category.
![](http://wmstatic.global.ssl.fastly.net/ml/7140723-f-95dcf6bd-8570-4b84-9d1e-9ee5f9df3da5.png?width=204&height=366)
Press Delete Limit.
![](http://wmstatic.global.ssl.fastly.net/ml/7140723-f-07e239ce-894f-4037-999e-88b5dba5abe2.png?width=204&height=366)
Press Delete Limit.
![](http://wmstatic.global.ssl.fastly.net/ml/7140723-f-a27c14a0-5af6-4cc2-b089-4cd4d11a1126.png?width=204&height=366)
Press arrow left.
![](http://wmstatic.global.ssl.fastly.net/ml/7140723-f-1238627c-92cb-43f3-9190-5278cd21e9b9.png?width=204&height=366)
7. Select communication limits during Screen Time
Press Communication Limits.
![](http://wmstatic.global.ssl.fastly.net/ml/7140723-f-ab94af69-fb7b-42ce-a7df-5df337dbf454.png?width=204&height=366)
Press During Screen Time.
![](http://wmstatic.global.ssl.fastly.net/ml/7140723-f-aeaf7a50-3068-425d-887a-fc1a468ef90d.png?width=204&height=366)
Press the required setting.
During Screen Time, only communication with allowed contacts is available.
![](http://wmstatic.global.ssl.fastly.net/ml/7140723-f-3aa04fcc-e174-4849-b62d-74229b4a82ec.png?width=204&height=366)
Press arrow left.
![](http://wmstatic.global.ssl.fastly.net/ml/7140723-f-3aa04fcc-e174-4849-b62d-74229b4a82ec.png?width=204&height=366)
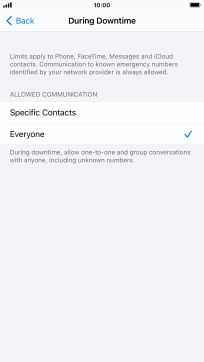
8. Select communication limits during Downtime
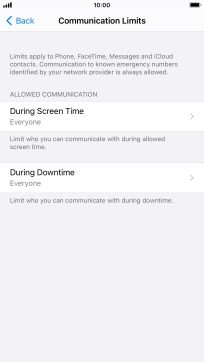
Press During Downtime.
![](http://wmstatic.global.ssl.fastly.net/ml/7140723-f-aeaf7a50-3068-425d-887a-fc1a468ef90d.png?width=204&height=366)
Press the required setting.
During Downtime, only communication with allowed contacts is available.
![](http://wmstatic.global.ssl.fastly.net/ml/7140723-f-63dccbc3-b7f3-4d84-bd85-016987453680.png?width=204&height=366)
If you select Specific Contacts, follow the instructions on the screen to select the required contacts.
![](http://wmstatic.global.ssl.fastly.net/ml/7140723-f-63dccbc3-b7f3-4d84-bd85-016987453680.png?width=204&height=366)
Press arrow left.
![](http://wmstatic.global.ssl.fastly.net/ml/7140723-f-63dccbc3-b7f3-4d84-bd85-016987453680.png?width=204&height=366)
Press arrow left.
![](http://wmstatic.global.ssl.fastly.net/ml/7140723-f-aeaf7a50-3068-425d-887a-fc1a468ef90d.png?width=204&height=366)
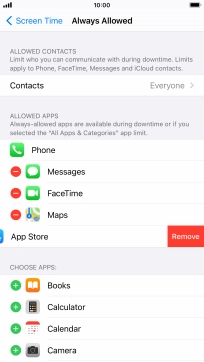
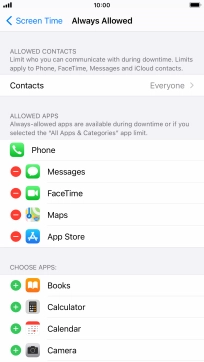
9. Select apps that can be used during Downtime
Press Always Allowed.
![](http://wmstatic.global.ssl.fastly.net/ml/7140723-f-ab94af69-fb7b-42ce-a7df-5df337dbf454.png?width=204&height=366)
Press the add icon next to the required app to add it to the list of allowed apps during Downtime.
![](http://wmstatic.global.ssl.fastly.net/ml/7140723-f-110aa3d8-bf54-40af-9cf7-52b871f7348d.png?width=204&height=366)
Press the remove icon next to the required app to remove it from the list of allowed apps during Downtime.
![](http://wmstatic.global.ssl.fastly.net/ml/7140723-f-29a44c3a-a266-4c75-a883-ddcacad5ec3d.png?width=204&height=366)
Press Remove.
![](http://wmstatic.global.ssl.fastly.net/ml/7140723-f-4a40e3c7-5e94-4353-adf5-a305f4c8cefb.png?width=204&height=366)
Press arrow left.
![](http://wmstatic.global.ssl.fastly.net/ml/7140723-f-110aa3d8-bf54-40af-9cf7-52b871f7348d.png?width=204&height=366)
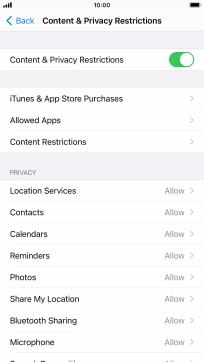
10. Select settings for content and restrictions
Press Content & Privacy Restrictions.
![](http://wmstatic.global.ssl.fastly.net/ml/7140723-f-ab94af69-fb7b-42ce-a7df-5df337dbf454.png?width=204&height=366)
Press the indicator next to "Content & Privacy Restrictions" and follow the instructions on the screen to select settings for content and privacy restrictions.
![](http://wmstatic.global.ssl.fastly.net/ml/7140723-f-069d082e-dbe0-4ceb-9497-2f8eb8ec85fc.png?width=204&height=366)
Press arrow left.
![](http://wmstatic.global.ssl.fastly.net/ml/7140723-f-67408fd2-cce1-4d7b-a383-e814f3ac36f5.png?width=204&height=366)
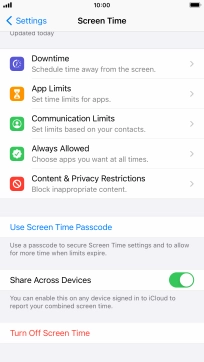
11. Turn on use of password
Press Use Screen Time Passcode and follow the instructions on the screen to select a Screen Time password.
If you turn on the function, you need to key in the password to access Screen Time settings.
![](http://wmstatic.global.ssl.fastly.net/ml/7140723-f-58ddef53-4243-4422-8709-56c133856da6.png?width=204&height=366)
12. Return to the home screen
Press the Home key to return to the home screen.
![](http://wmstatic.global.ssl.fastly.net/ml/7140723-f-ab94af69-fb7b-42ce-a7df-5df337dbf454.png?width=204&height=366)