


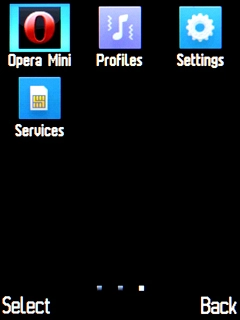
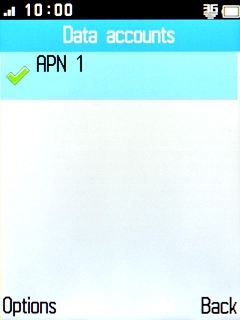
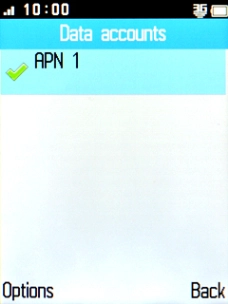
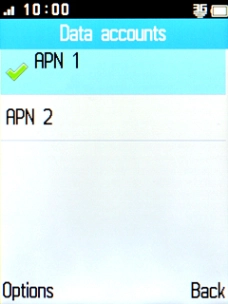
1. Find "Data accounts"
Press the Navigation key.

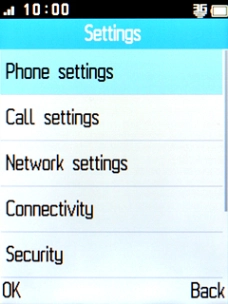
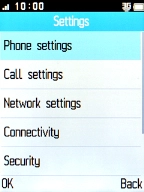
1. Find "Data accounts"
Select Settings.


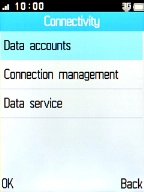
1. Find "Data accounts"
Select Connectivity.


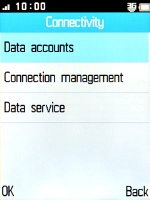
1. Find "Data accounts"
Select Data accounts.
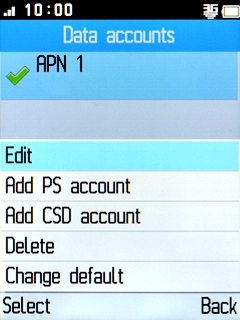
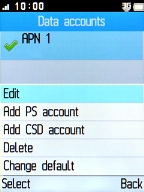
2. Create new data connection
Press the Left selection key.
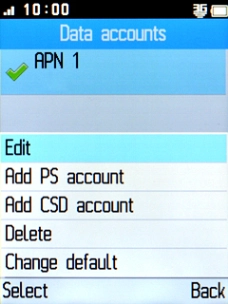

2. Create new data connection
Select Add PS account.

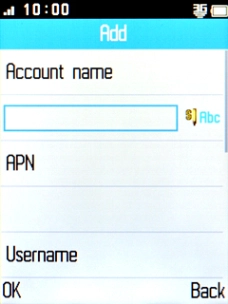

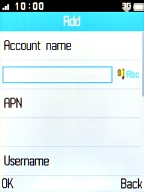
2. Create new data connection
Highlight the field below "Account name" and key in Vodafone MMS.
3. Enter APN
Highlight the field below "APN" and key in mms.vodafone.net.
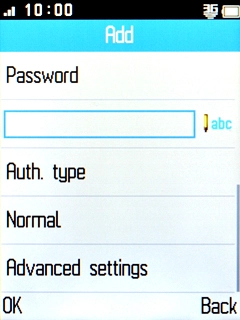

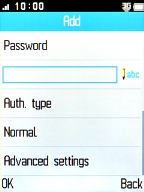
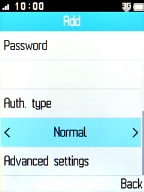
4. Select authentication type
Highlight the field below "Auth. type".


4. Select authentication type
Press Navigation key right or Navigation key left to select Normal.
5. Select picture messaging server
Select Advanced settings.


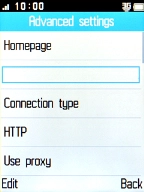
5. Select picture messaging server
Highlight the field below "Homepage" and key in http://www.vodafone.ie/mms.
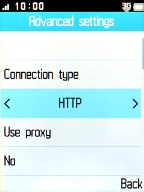
6. Select connection type
Highlight the field below "Connection type".


6. Select connection type
Press Navigation key right or Navigation key left to select HTTP.
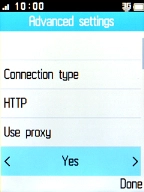
7. Turn on use of proxy
Highlight the field below "Use proxy".


7. Turn on use of proxy
Press Navigation key right or Navigation key left to select Yes.


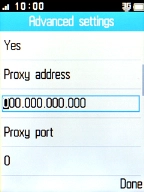
8. Enter IP address
Highlight the field below "Proxy address" and key in 10.24.59.200.
9. Enter port number
Highlight the field below "Proxy port" and key in 80.
10. Save data connection
Press the Right selection key.


11. Return to the home screen
Press Disconnect to return to the home screen.
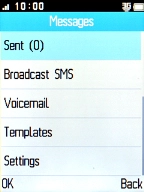
12. Find "Data account"
Press the Navigation key.


12. Find "Data account"
Select Messages.


12. Find "Data account"
Select Settings.


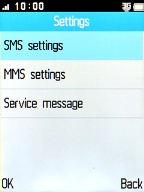
12. Find "Data account"
Select MMS settings.


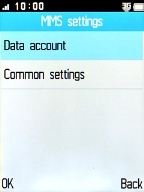
12. Find "Data account"
Select Data account.


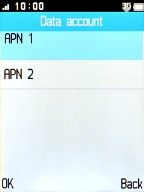
13. Active data connection
Highlight the required data connection.
13. Active data connection
Press the Left selection key.
14. Return to the home screen
Press Disconnect to return to the home screen.
1. Find "Data accounts"


2. Create new data connection

3. Enter APN
4. Select authentication type
5. Select picture messaging server
6. Select connection type
7. Turn on use of proxy
8. Enter IP address
9. Enter port number
10. Save data connection
11. Return to the home screen

12. Find "Data account"
13. Active data connection
14. Return to the home screen