Apple iPhone 4S iOS 5

Apple iPhone 4S

Back up phone memory - Apple iPhone 4S iOS 5

Read help info

Before updating your phone's software, it's recommended that you back up the phone memory to ensure that no data is lost. It can also be useful to back up the phone memory regularly to ensure that no data is lost in case of defects and crashes. Follow these instructions to back up the phone memory.

Apple iPhone 4S iOS 5
Step 1 of 12

Select option

Back up the phone memory using iTunes, go to 1a.
Back up the phone memory using iCloud, go to 1b
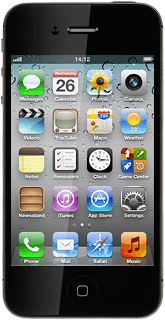
Step 2 of 12

1a - Back up the phone memory using iTunes

Start the program iTunes on your computer.

Before you can back up the phone memory using iTunes, you need to install the program iTunes on your computer.
Step 3 of 12

1a - Back up the phone memory using iTunes

Connect the data cable to the socket at the bottom of your phone and to your computer's USB port.
Depending on your settings in iTunes, backup may start automatically.

Before you can back up the phone memory using iTunes, you need to install the program iTunes on your computer.
Step 4 of 12

1a - Back up the phone memory using iTunes

To start backup manually:
Select Back up to iCloud or Back up to this computer.

Before you can back up the phone memory using iTunes, you need to install the program iTunes on your computer.
Step 5 of 12

1a - Back up the phone memory using iTunes

Right-click your phone in the menu to the left.

Before you can back up the phone memory using iTunes, you need to install the program iTunes on your computer.
Step 6 of 12

1a - Back up the phone memory using iTunes

Select Back Up.

Before you can back up the phone memory using iTunes, you need to install the program iTunes on your computer.
Step 7 of 12

1b - Back up the phone memory using iCloud

Press Settings.

To synchronise the contents of your phone continuously, press the indicator next to the required data type to turn on synchronisation.
Step 8 of 12

1b - Back up the phone memory using iCloud

Press iCloud.
If it's the first time you use the application, you need to log on.

To synchronise the contents of your phone continuously, press the indicator next to the required data type to turn on synchronisation.
Step 9 of 12

1b - Back up the phone memory using iCloud

Press Storage & Backup.

To synchronise the contents of your phone continuously, press the indicator next to the required data type to turn on synchronisation.
Step 10 of 12

1b - Back up the phone memory using iCloud

Press the indicator next to iCloud Backup to turn on the function.

To synchronise the contents of your phone continuously, press the indicator next to the required data type to turn on synchronisation.
Step 11 of 12

1b - Back up the phone memory using iCloud

Press OK.

To synchronise the contents of your phone continuously, press the indicator next to the required data type to turn on synchronisation.
Step 12 of 12

1b - Back up the phone memory using iCloud

Press Back Up Now.

To synchronise the contents of your phone continuously, press the indicator next to the required data type to turn on synchronisation.

Select option

Back up the phone memory using iTunes, go to 1a.
Back up the phone memory using iCloud, go to 1b
Apple iPhone 4S iOS 5

1a - Back up the phone memory using iTunes

Start the program iTunes on your computer.
Before you can back up the phone memory using iTunes, you need to install the program iTunes on your computer.
Connect the data cable to the socket at the bottom of your phone and to your computer's USB port.
Depending on your settings in iTunes, backup may start automatically.
Before you can back up the phone memory using iTunes, you need to install the program iTunes on your computer.
To start backup manually:
Select Back up to iCloud or Back up to this computer.
Before you can back up the phone memory using iTunes, you need to install the program iTunes on your computer.
Right-click your phone in the menu to the left.
Before you can back up the phone memory using iTunes, you need to install the program iTunes on your computer.
Select Back Up.
Before you can back up the phone memory using iTunes, you need to install the program iTunes on your computer.

1b - Back up the phone memory using iCloud

Press Settings.
To synchronise the contents of your phone continuously, press the indicator next to the required data type to turn on synchronisation.
Press iCloud.
If it's the first time you use the application, you need to log on.
To synchronise the contents of your phone continuously, press the indicator next to the required data type to turn on synchronisation.
Press Storage & Backup.
To synchronise the contents of your phone continuously, press the indicator next to the required data type to turn on synchronisation.
Press the indicator next to iCloud Backup to turn on the function.
To synchronise the contents of your phone continuously, press the indicator next to the required data type to turn on synchronisation.
Press OK.
To synchronise the contents of your phone continuously, press the indicator next to the required data type to turn on synchronisation.
Press Back Up Now.
To synchronise the contents of your phone continuously, press the indicator next to the required data type to turn on synchronisation.

Get information on...

Or select...

Another device
4g accessories icon-app-store basket-change battery-life battery bill-pay-phones-icon 4C91DB73-75FE-4565-8F69-BC6C675B1EA1 bin block Brands broadband-icon broadband calendar call camera cases Chat chevron-down chevron-left chevron-right chevron-up close close collections€€ community continuous contract dashboard data download-square Download edit error-circle eye facebook filters folder go identity Less letters location Memory menu message mobile my-vodafone network_signal operating-system orders payg-phones-icon F86C85F6-FFFF-4C62-8F9A-45D7251FC836 payment photos play-store play plus rating report return roaming screen-size search secure-net shopping sim spinner squares technology tick-simple top-up top-up TV twitter value vf-tv-icon vodafone warning Weight world
Close dialog
Skip to content

Login to My Vodafone

Close dialog
Skip to content

Register with My Vodafone